Luce sui POI di Ashika Island: nuova mappa di Warzone 2 avrà anche l’IA
Nel corso della serata di ieri gli sviluppatori di Activision hanno finalmente svelato tutti i primi dettagli relativi ad Ashika Island, nuovissima mappa Ritorno presto in arrivo su Warzone 2.
Con questa nuova “protagonista”, i giocatori si preparano per gettarsi nuovamente in battaglia su di una mappa più piccola, e su di una modalità di gioco che stravolge i ritmi solitamente “lenti” del BR e che avvicina in modo sostanziale il battle royale al multiplayer.
Ashika Island si presenta come un’isola, composta principalmente da otto POI (punti di interesse, ndr). Questi sono:
- Castello Tsuki – Zona che abbiamo già visto come mappa multiplayer in Vanguard e World at War
- Town Center – Il “centro” della città
- Beach Club – Uno stabilimento balneare sulla spiaggia
- Shipwreck – Zona sulla spiaggia dove si trovano dei relitti di navi naufragate
- Port Ashika – il “porto” dell’isola
- Oganikku Farms – Zona a nord piena di capannoni, edifici e magazzini di stoccaggio
- Residential – Anche questa a nord dell’isola, zona “residenziale” dove troviamo diverse case con in mezzo una gigantesca struttura turistica
Per quanto riguarda gli altri contenuti che caratterizzeranno Ashika Island, i devs hanno confermato che in questa sarà presente anche l’IA, con i bot controllati dal computer. La cosa non è stata salutata con entusiasmo dai giocatori, che in più di un’occasione hanno ribadito di essere stufi della presenza dell’IA.
Il dettaglio dell’overview ufficiale della mappa Ashika Island di Warzone 2
Point of Interest Ōganikku Farms
The majority of the northwestern sector of Ashika Island is composed of mixed agricultural, residential and industrial use, along with old shoreline defenses.
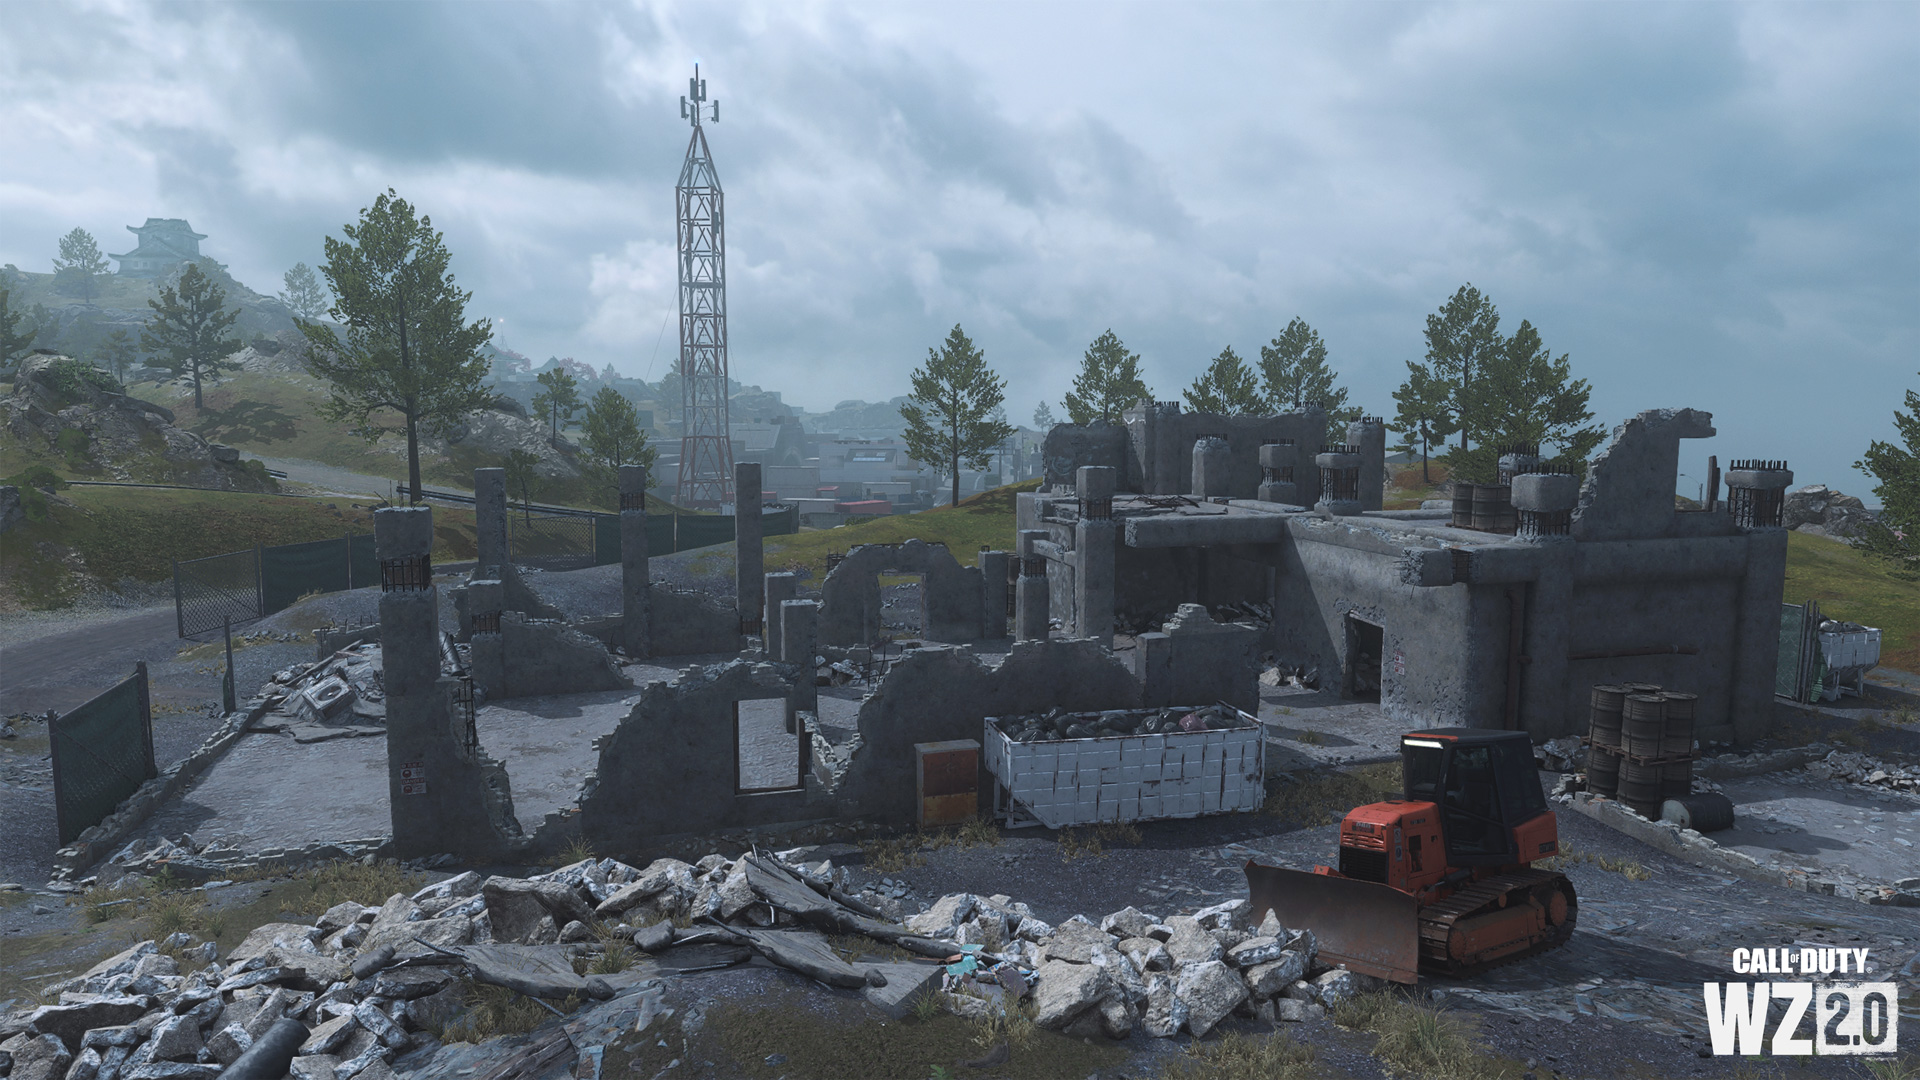
Lookout and Ruins
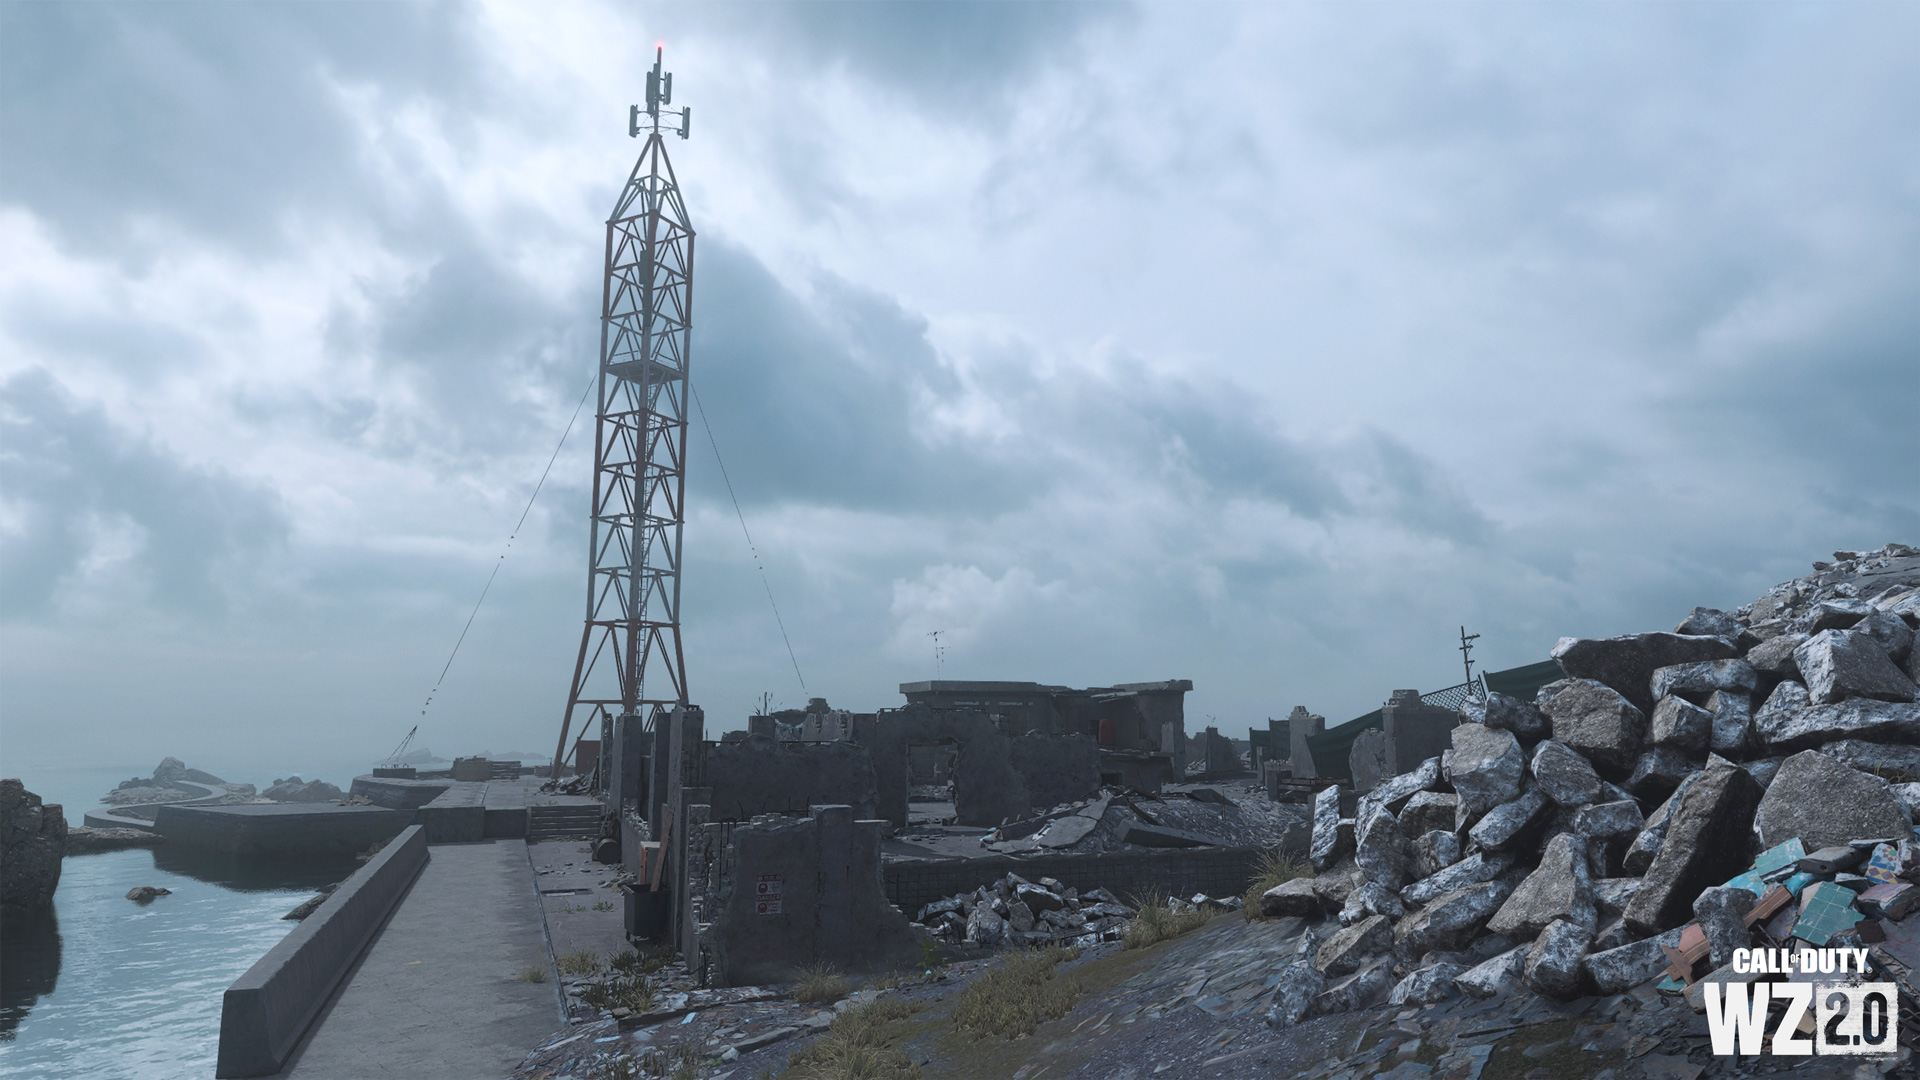
The far northwest edge of the island features a Comms Tower (one of three towers which are easily-spotted landmarks across the island) sitting on a narrow spit of sand, rocks, and a sea wall. Further in is a giant refuse pile of decaying concrete and two wartime structures undergoing extensive demolition.
North Beach
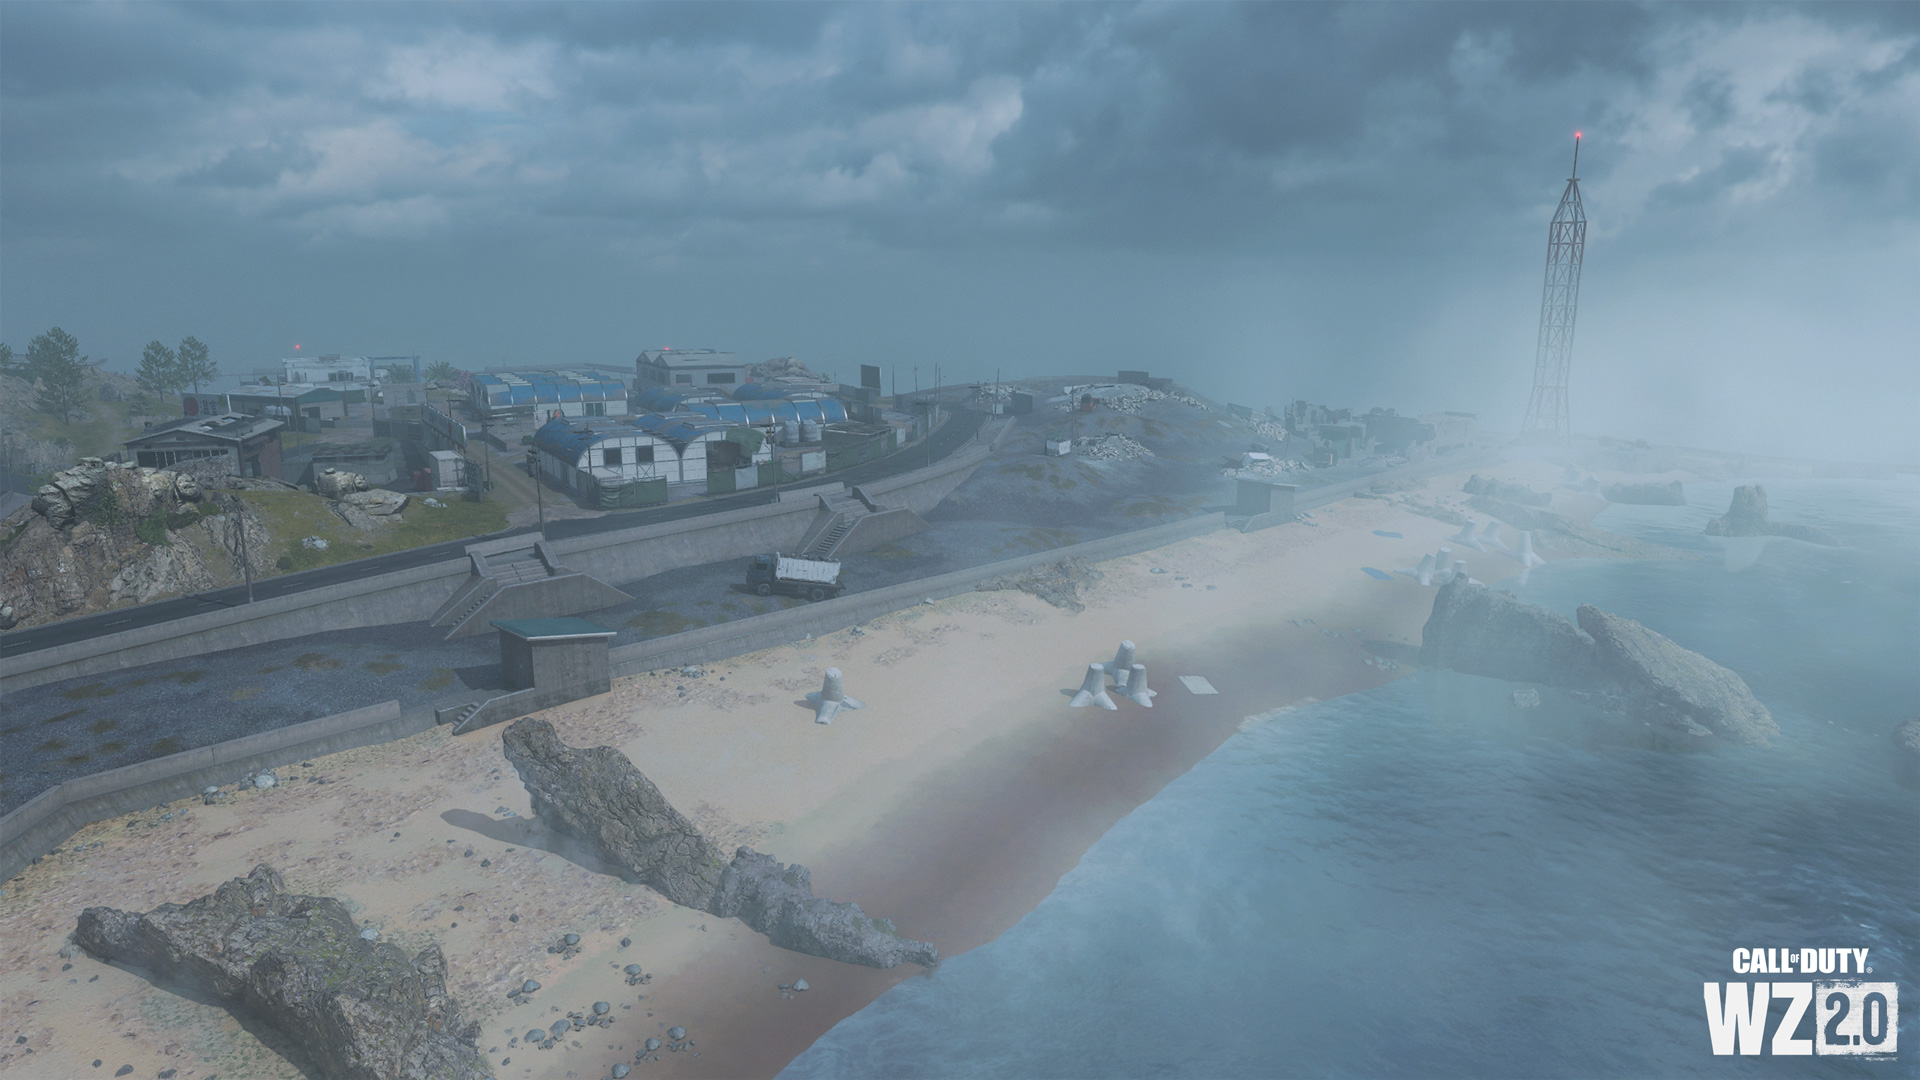
A shallow sandy beach with half-sunk dolos barriers, scattered boulders, and access to the main island, as well as the Water Treatment Facility to the east.
Greenhouses

A large agricultural facility featuring a yard,loading warehouses, and eight separate greenhouse structures, all with individually numbered rooftops to aid in location. Various crops (indicated by the cartoon fruit or vegetable on the walls) are grown here. Southeast is the main entrance and additional maintenance warehouses.
Point of Interest: Town Center
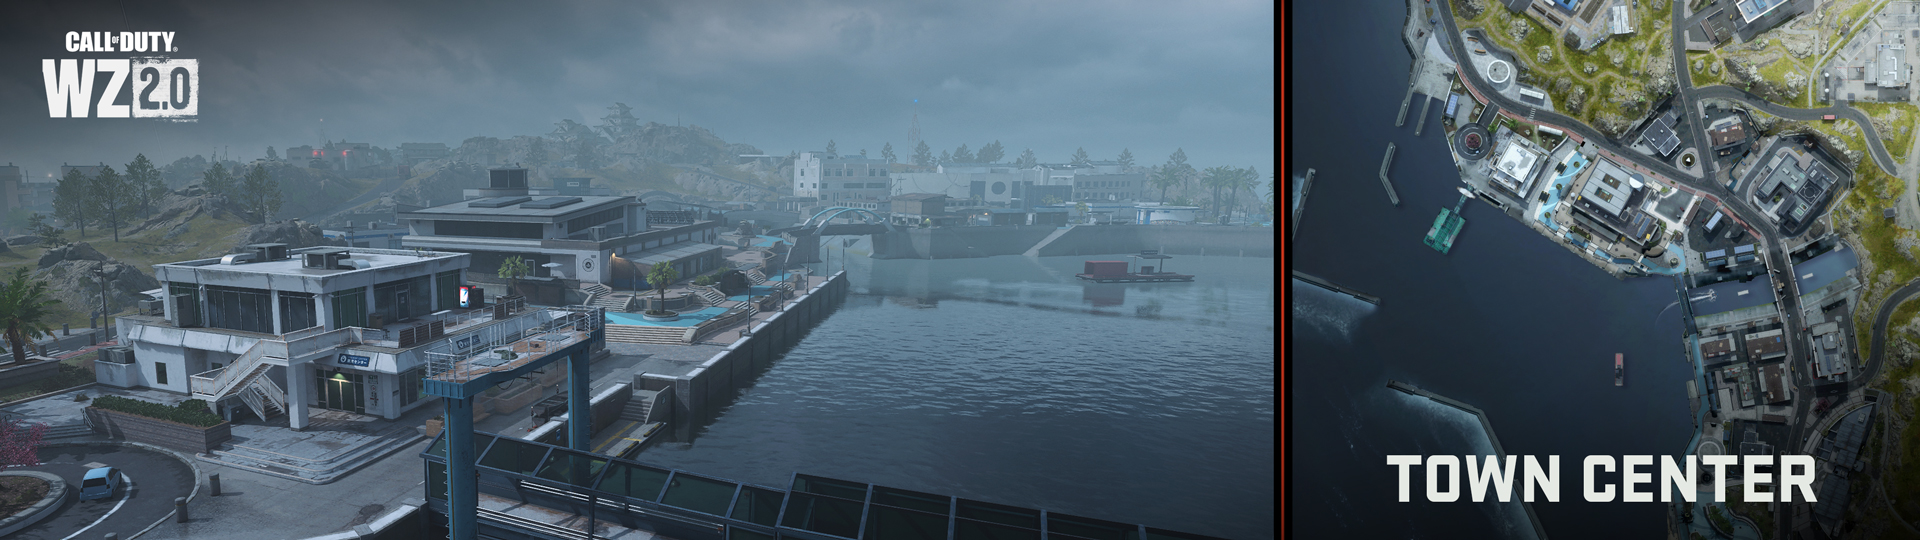
The western and parts of the southwestern island comprise a bay with impressive sea wall defenses. Northwest of the main submarine canal is a Ferry Terminal and tourist facilities. Cross the canal bridges to reach a hotel and market district, with an additional Gas Station and the semi-circular City Hall structure.
North Sea Wall
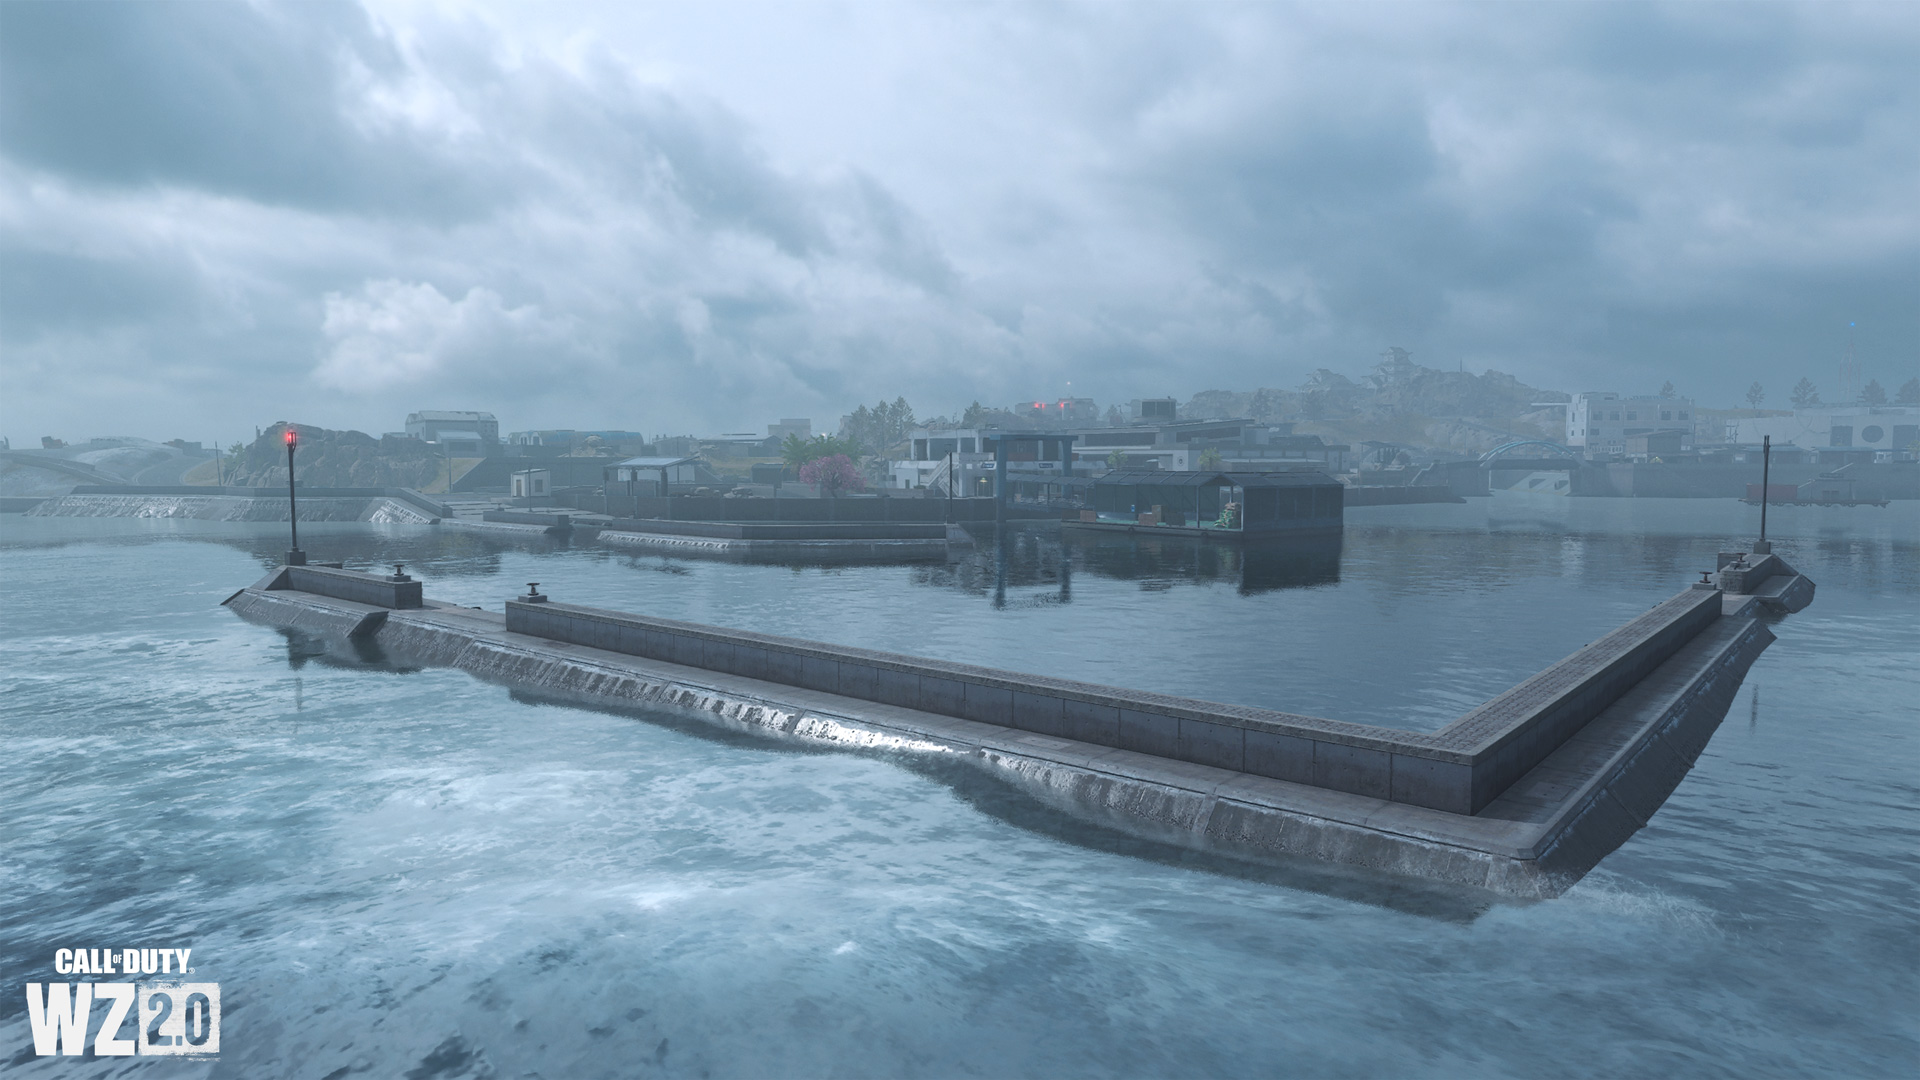
Further into the ocean are a pair of L-shaped concrete barriers sunk into the sea floor to prevent tidal flooding. These can be accessed, though the hiding potential is limited unless you enjoy lurking just under the water’s surface. There’s a small boat launch to complete this installation.
Ferry Terminal
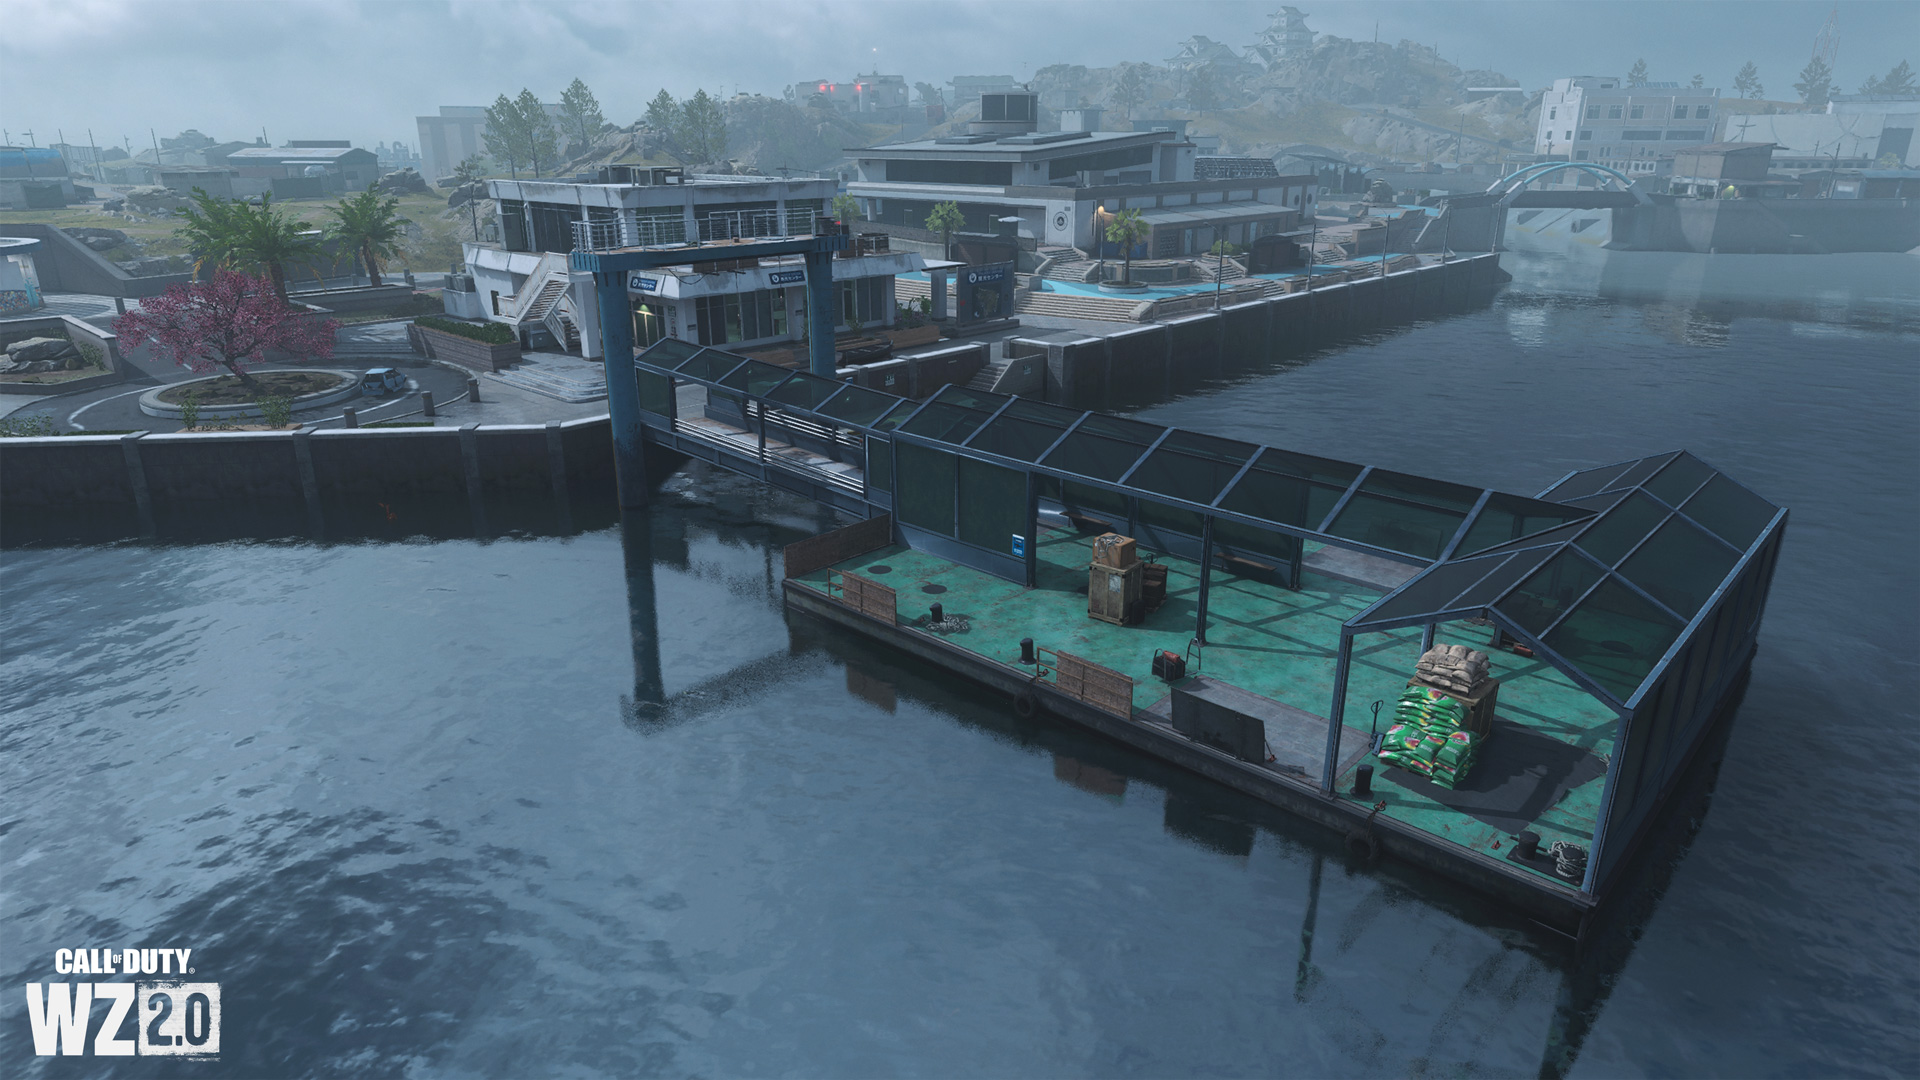
A steel-covered jetty allows visitors to disembark from the ferries that used to frequently arrive at the island before the recent hostilities began. The jetty offers quick access to the Tourist Center. In addition, you can reach the circular parking lot and restrooms (also structurally circular).
Tourist Center Building

A white concrete building stained with precipitation, this building offers visitors information (including a map of the island), as well as a small gift shop and kitchens. Operators may find interesting sightlines across the island towards Farms and Town Center.
Event Center Building

Parallel to the light-blue concrete sea-front promenade – which continues roughly east and southeast until it reaches the similarly-hued aquarium – is a medium-sized Event Center building, distinguishable by the signage and solar roof panels. Inside is a reception hall and a main ballroom with skylights.
Gas Station
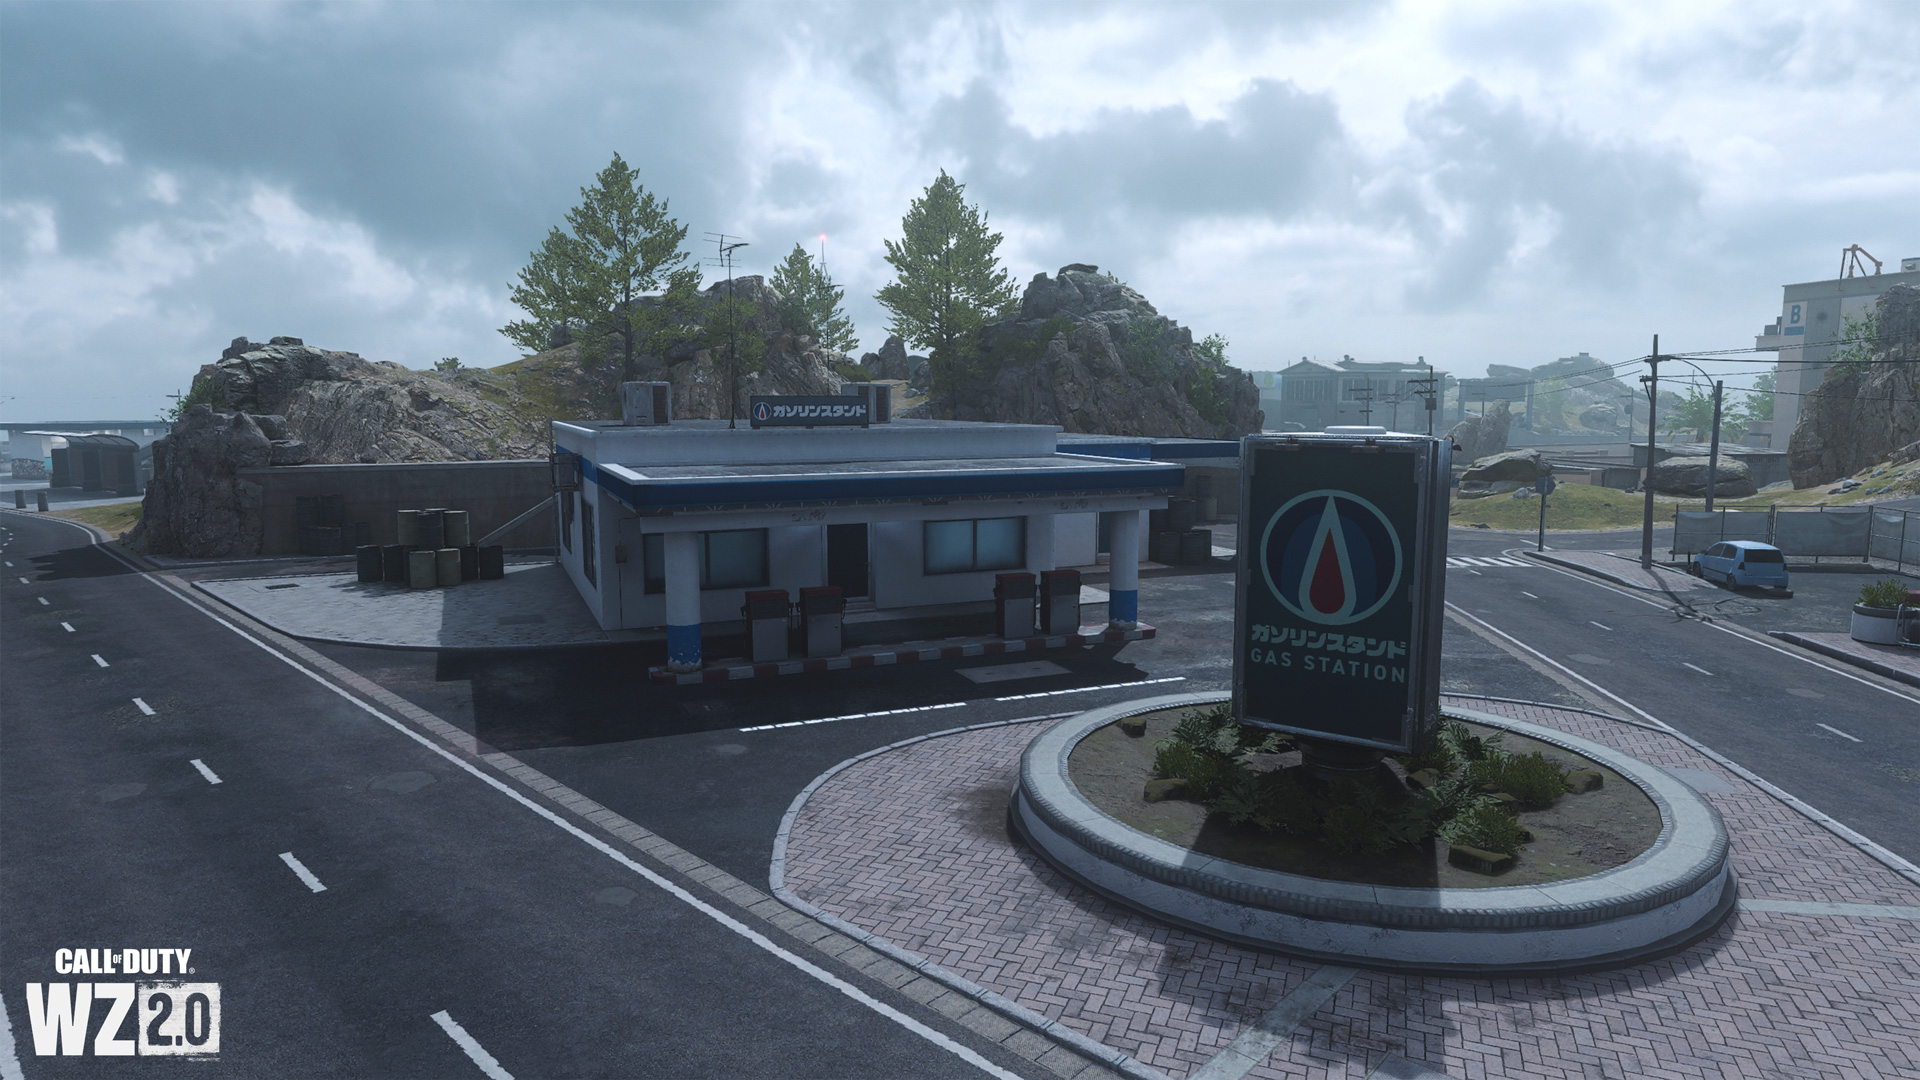
A small gas station offering all the vehicle-repairing and refueling capabilities you’re used to, along with excellent roadway access around the island
Science Center

Buttressed by a rock wall to the east and close to the waterways is a modern Science Center with numerous interior and roof access points. This roughly U-shaped structure has two interior floors (with a mezzanine balcony overlooking a main foyer, a staircase to the roof, and an easily-access elevator rappel point.
River Channel and Bridges

The western entrance to the interior Waterways under the island can be accessed from the canal channel, with two bridges spanning the gap. The sloping concrete banks are also easily accessed. Note the metal arch on the footbridge has a light blue hue.
South Sea Wall and Floating Gas Station
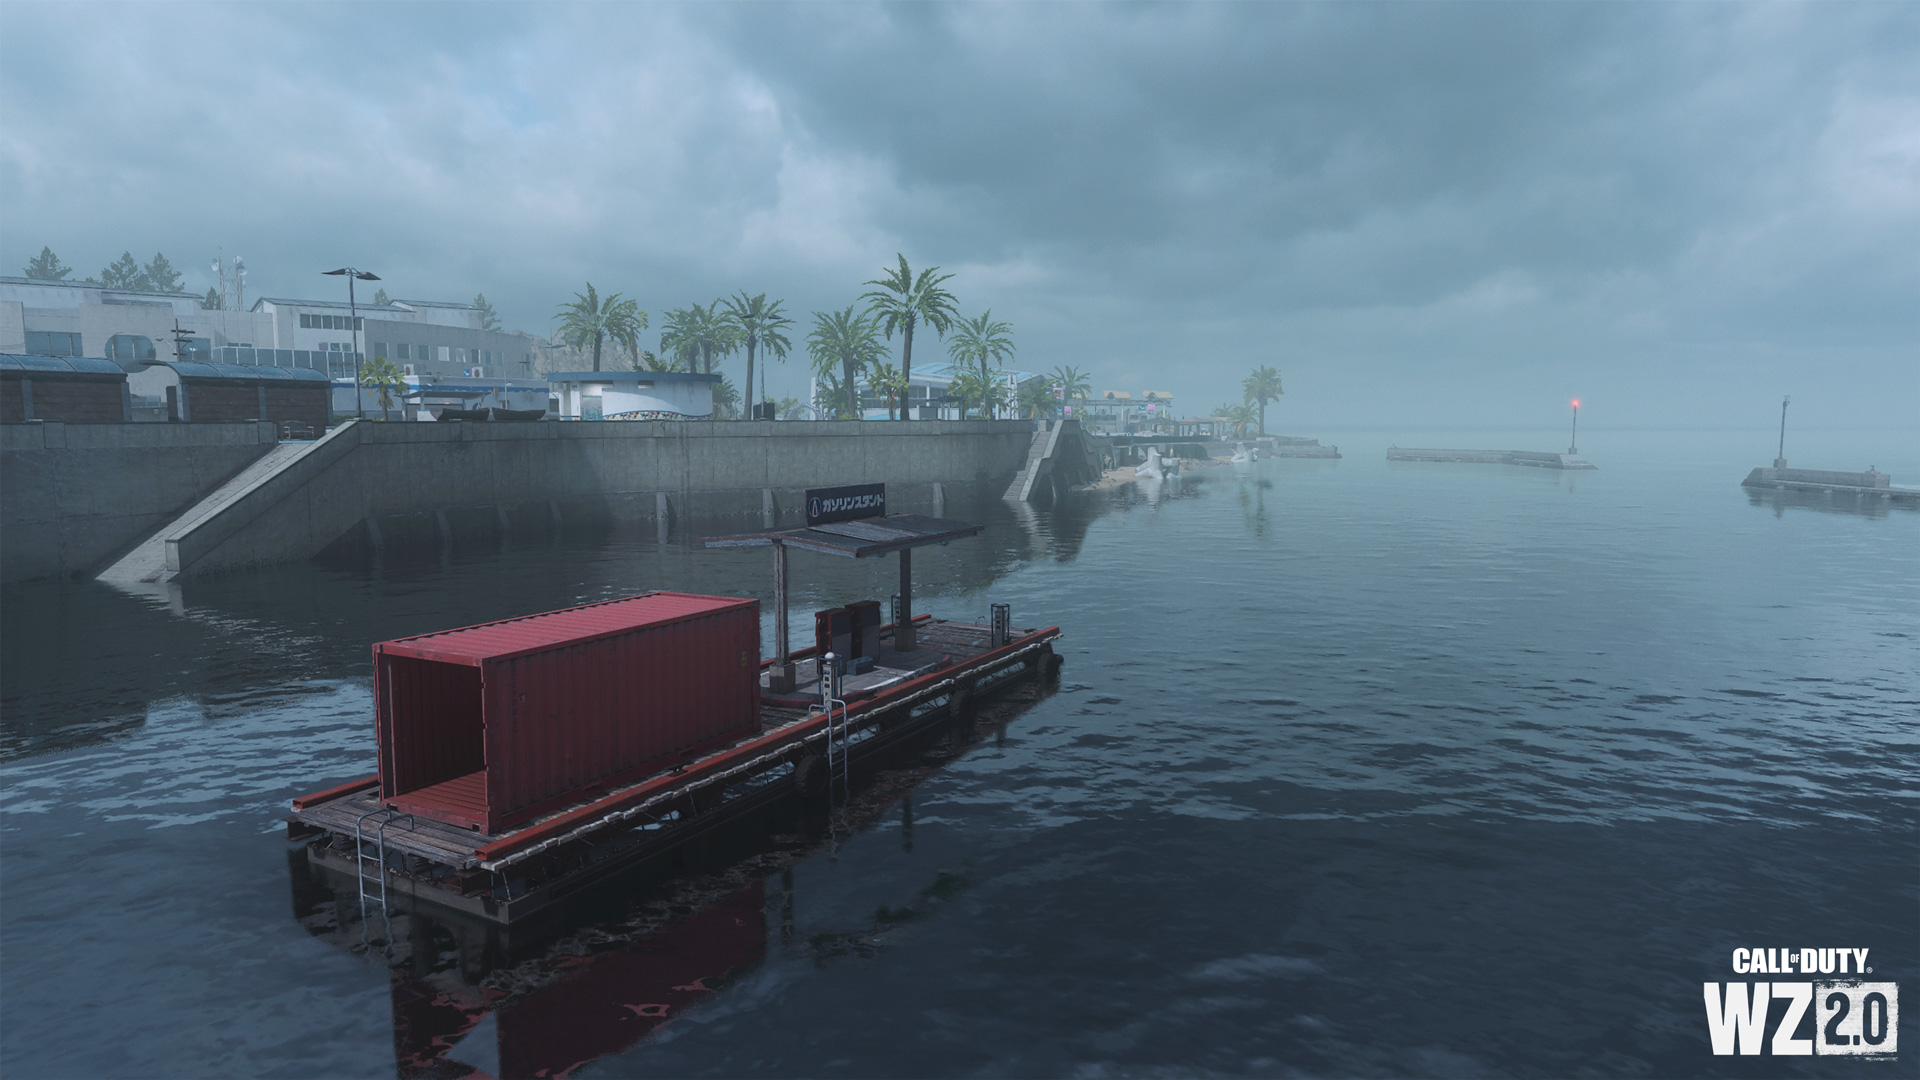
The harbor south of the open waterway channel features mostly calm waters, a floating Gas Station on a pontoon to refuel and repair your aquatic vehicles, and access to the main island via concrete promenade stairs. Note the sea wall is a place you can snipe from if you’re not concerned about cover. Check the tidal pool below the aquarium for an insertion point below the main entrances.
Market District and Hotel
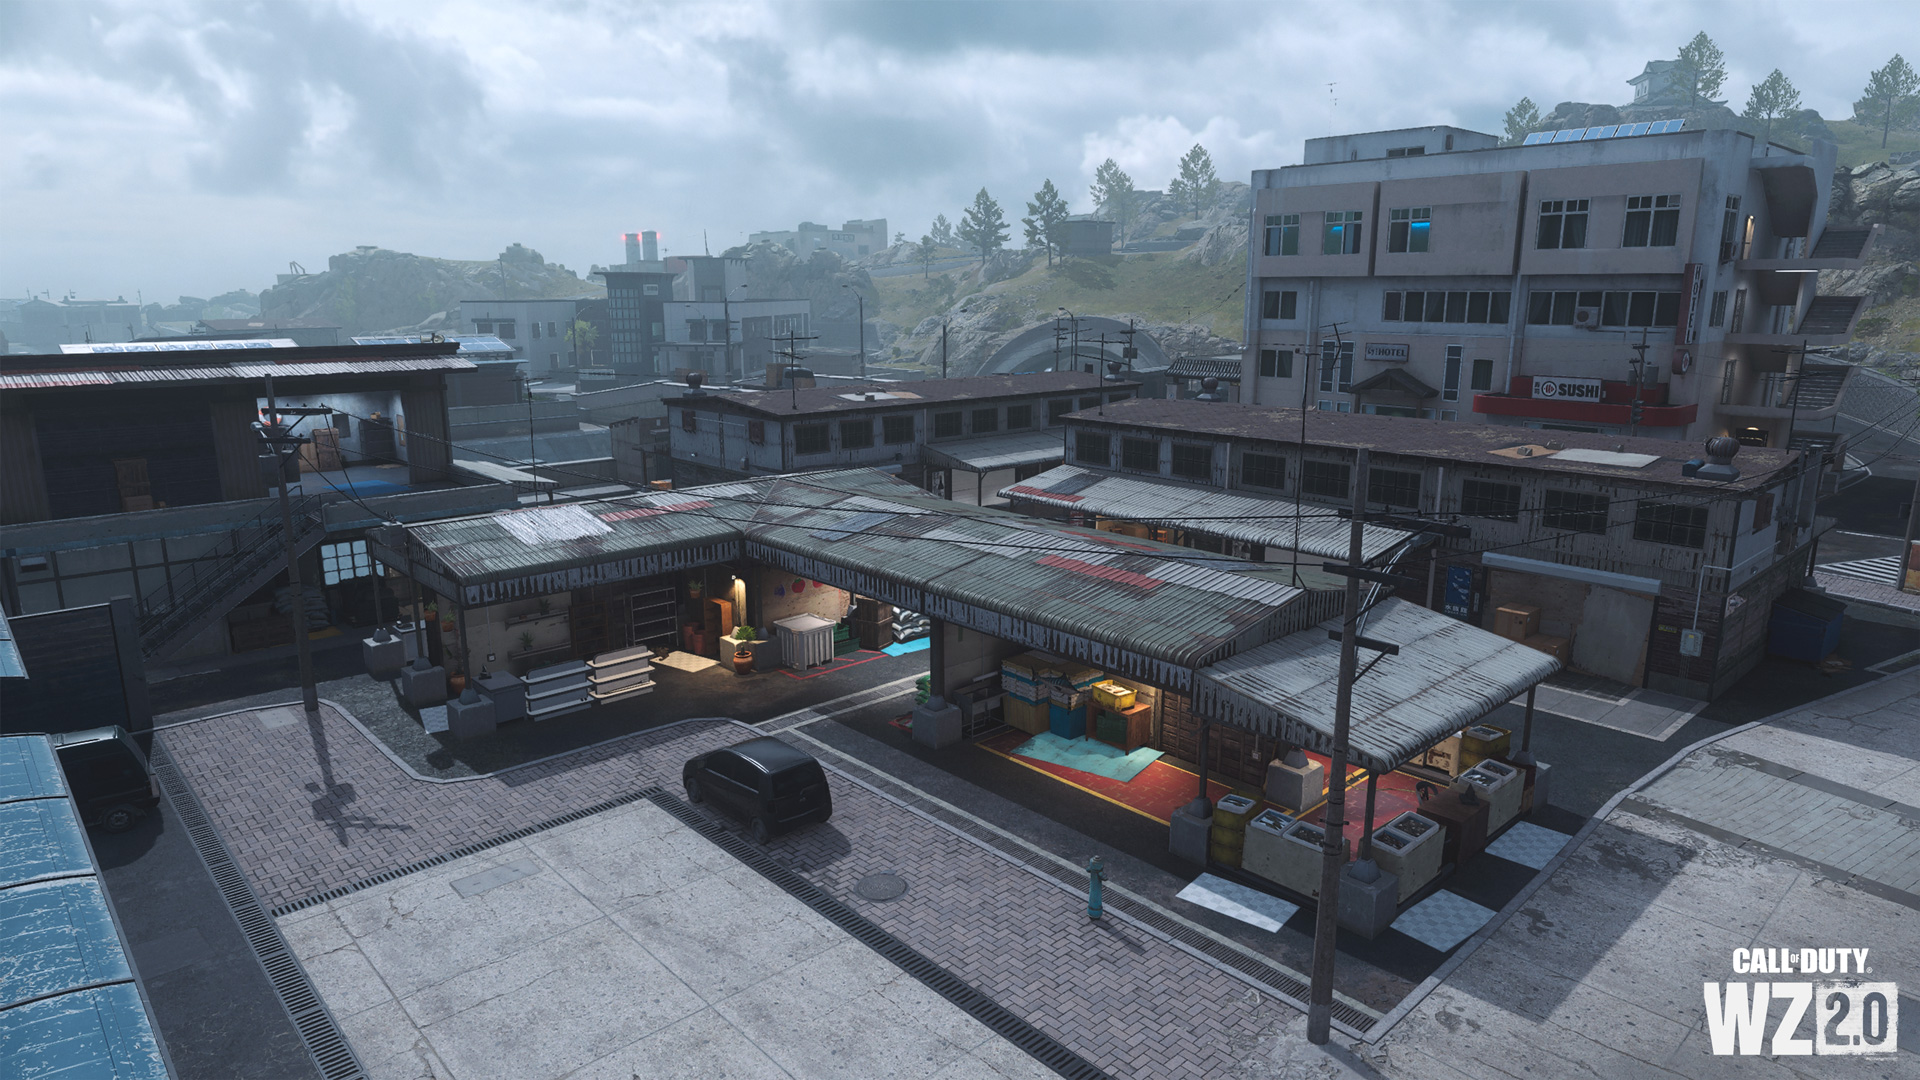
A small collection of warehouses with stalls selling a variety of local produce. There are numerous alcoves and rooftops to scramble about, as well as easy access to the water and canal. East and across the main road is a hotel with a ground-floor foyer,sushi bar, elevator rappel to the upper floor interior and two lavish rooms and roof access.
Gas Station

South of the market is a Gas Station to quickly refuel and repair, a circular restroom by the concrete promenade, and rapid access into the bay or the adjacent Town Hall.
Town Hall
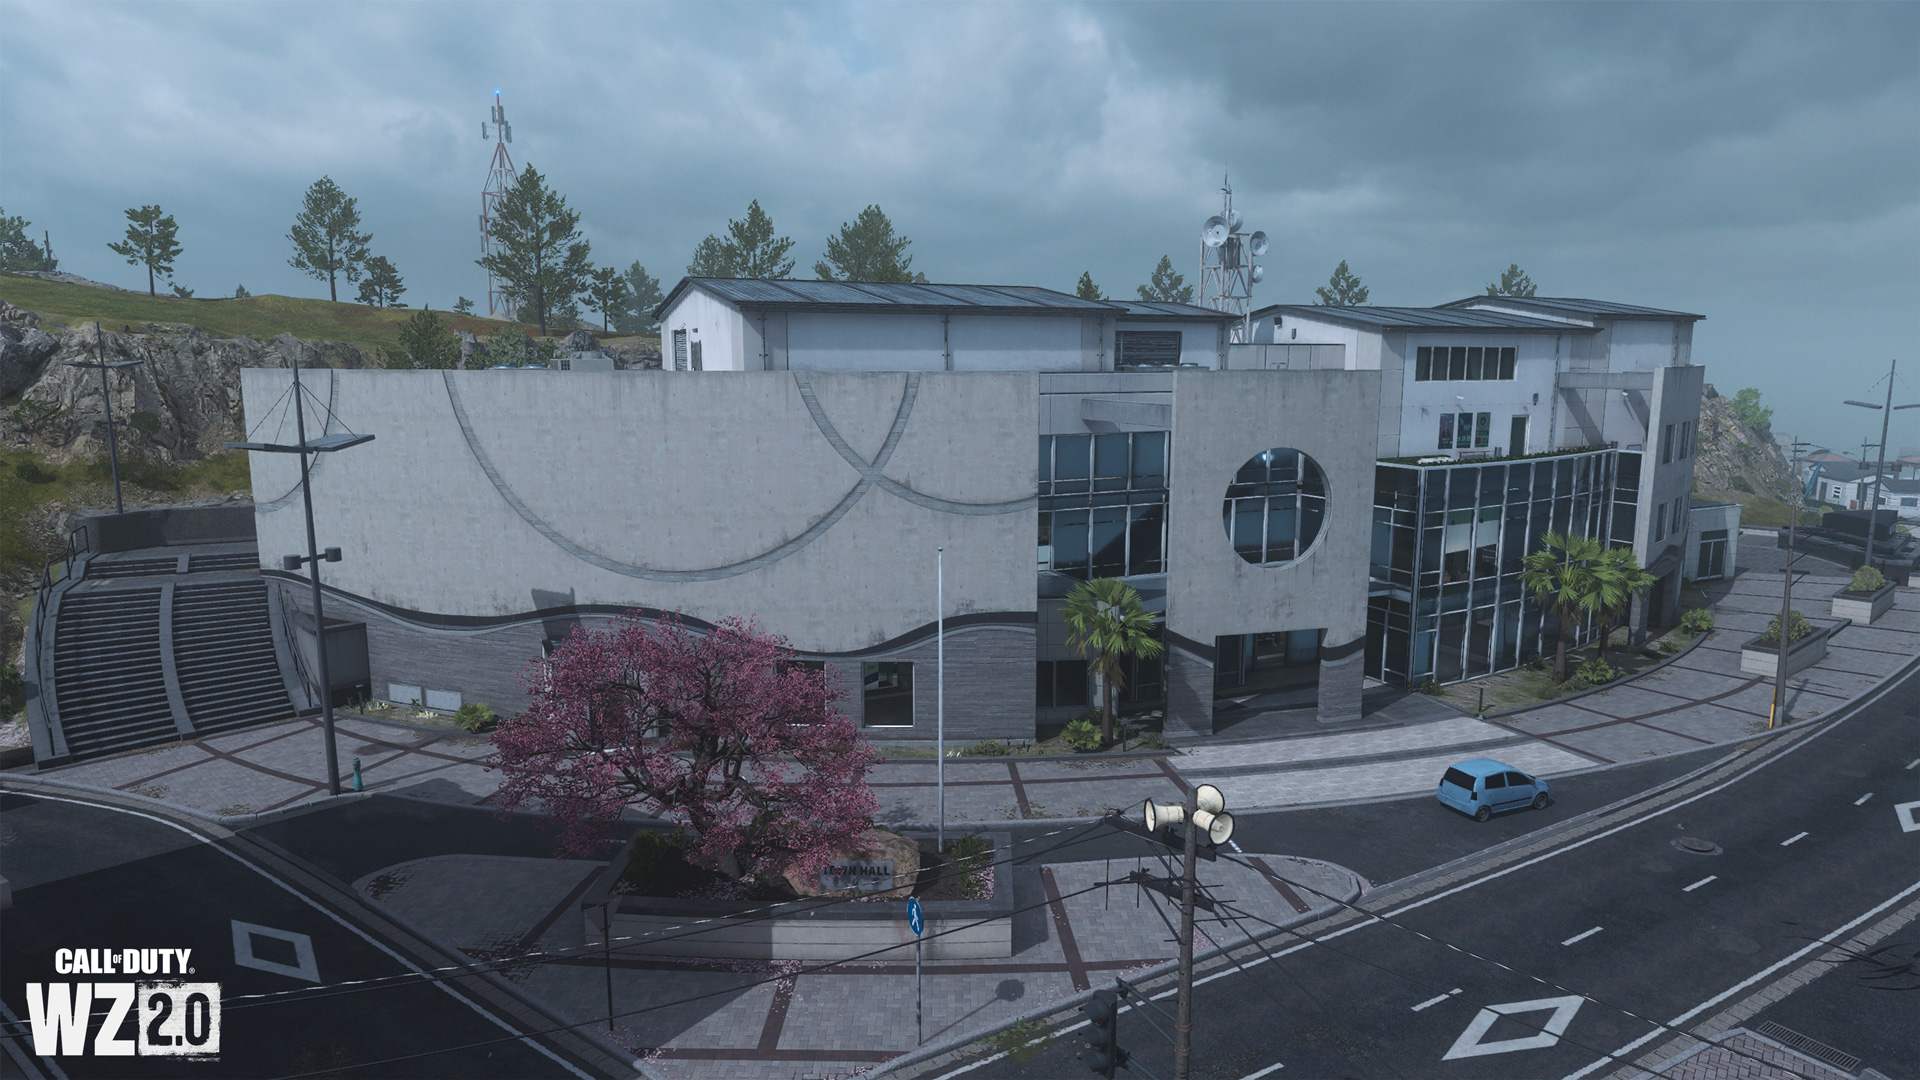
An impressive modern structure built in a semi-circular “slice” when viewed from above, this maze of concrete and glass. Inside is an expansive open-plan ground floor, escalators up to a small kitchen and mezzanine with display cases on show, and an upper floor featuring both an interior and exterior Zen garden. The rocky terrain behind the structure offers cover options and access to the castle grounds.
Point of Interest: Beach Club
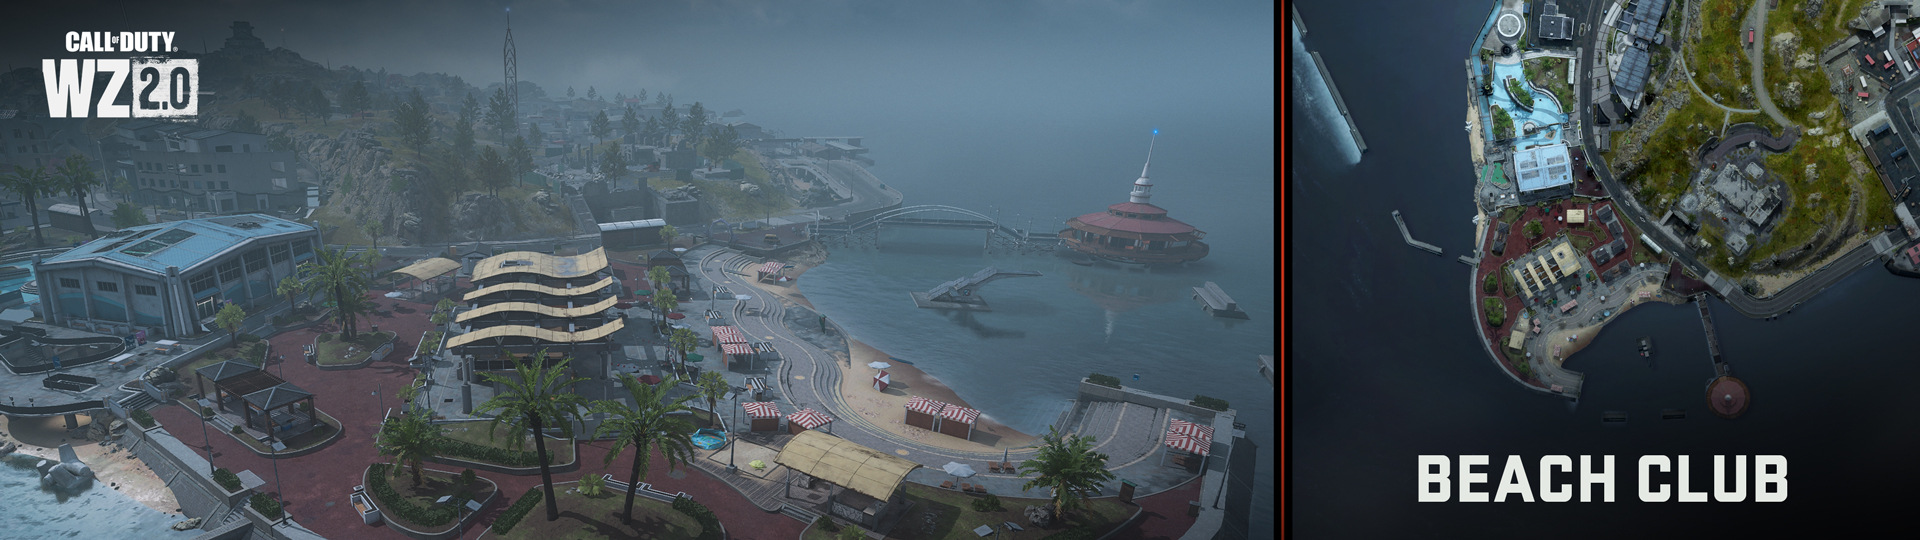
Further southwest of the Town Center and east of the Port is an aquarium and Beach Club and open-air swimming within the southwestern ocean beach. Parts of the area are easily spotted from a parachute drop as the pathways are a vivid aquamarine-blue color.
Aquarium

Most of the pathways north of the aquarium feature a painted blue hue, making them easy to spot from a great height. The aquarium is seemingly drained of life, consisting of a sizeable hall-sized exhibit room, a small parking lot, and a lower tidal pool by the ocean under the elevated (and gray color) walkway.
Beach Club and Bath House
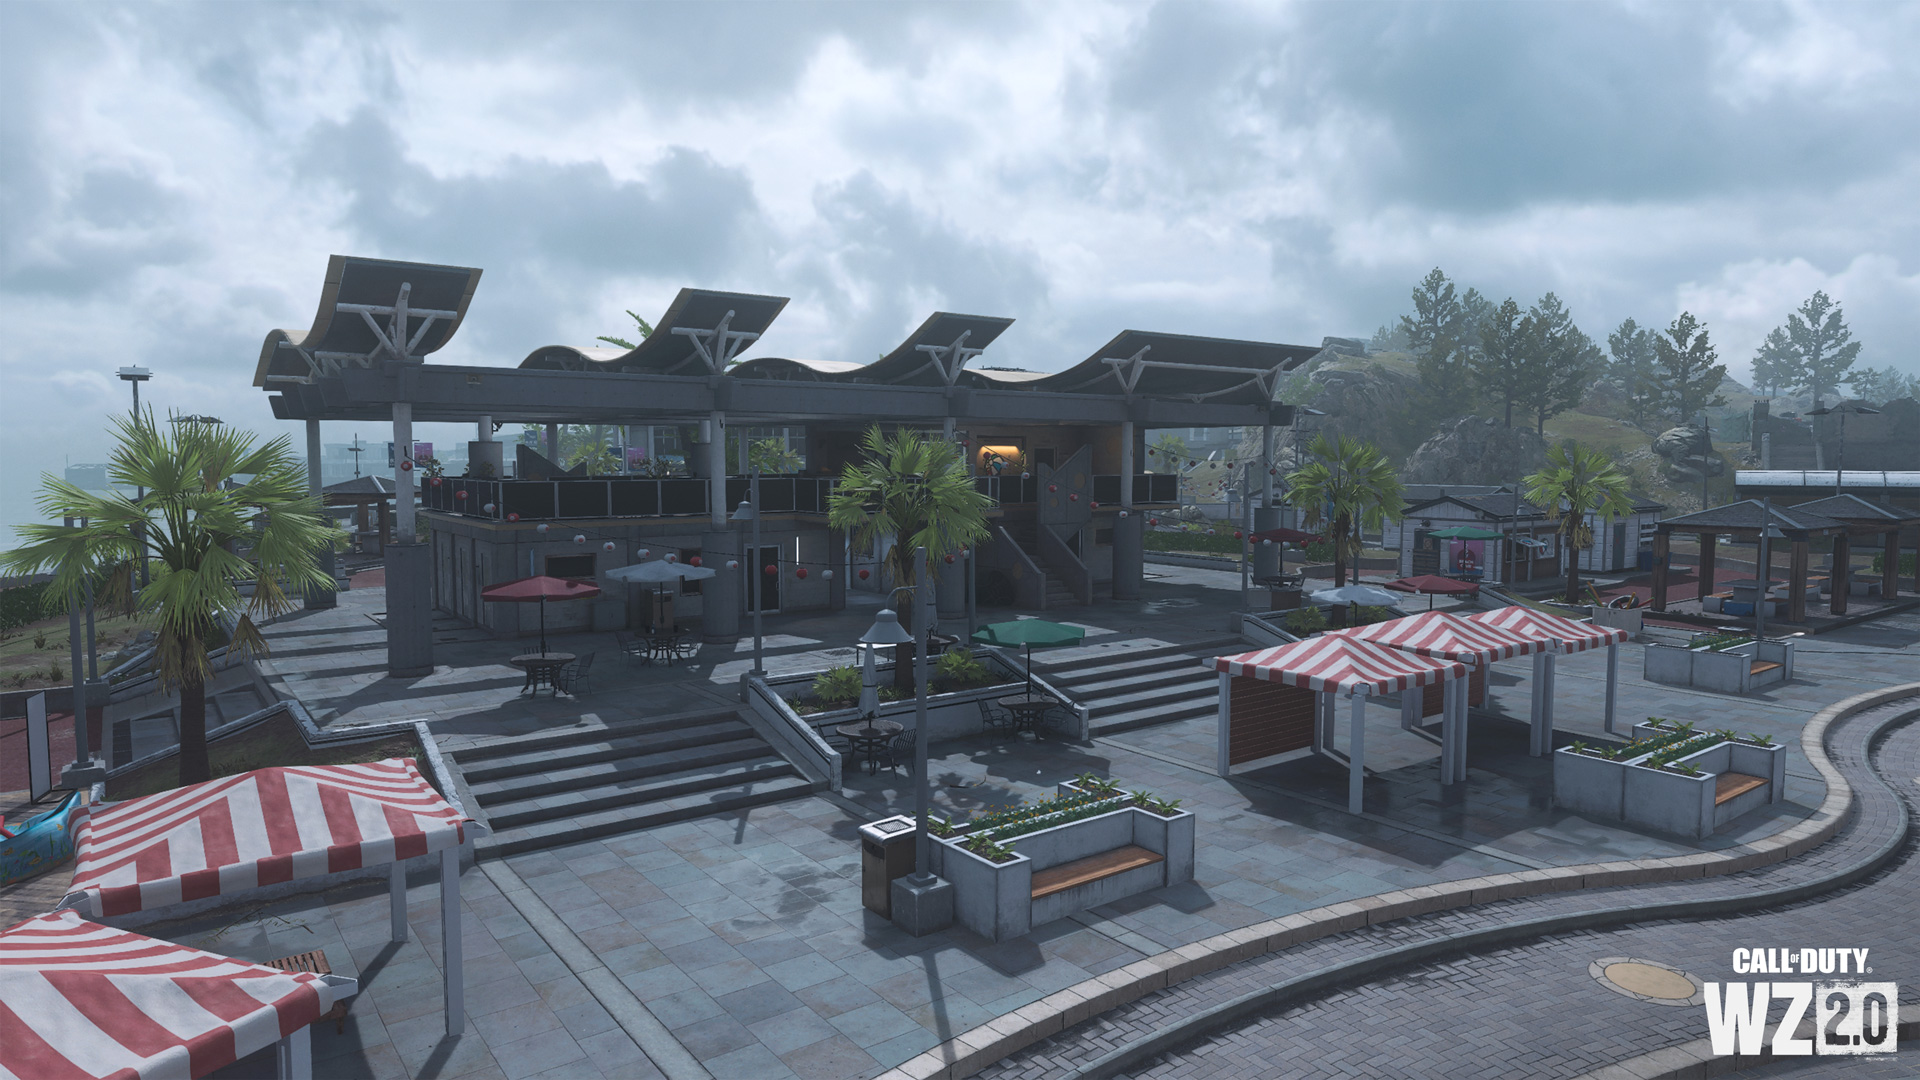
Also distinguishable by the color of the pathways, the burgundy pavement leads you through a large open barbecue area, a quartet of small, sealed huts, and the main Club House with partial opening to the elements. This main structure offers two bath chambers and an upper bar.
Beach and Observation Point
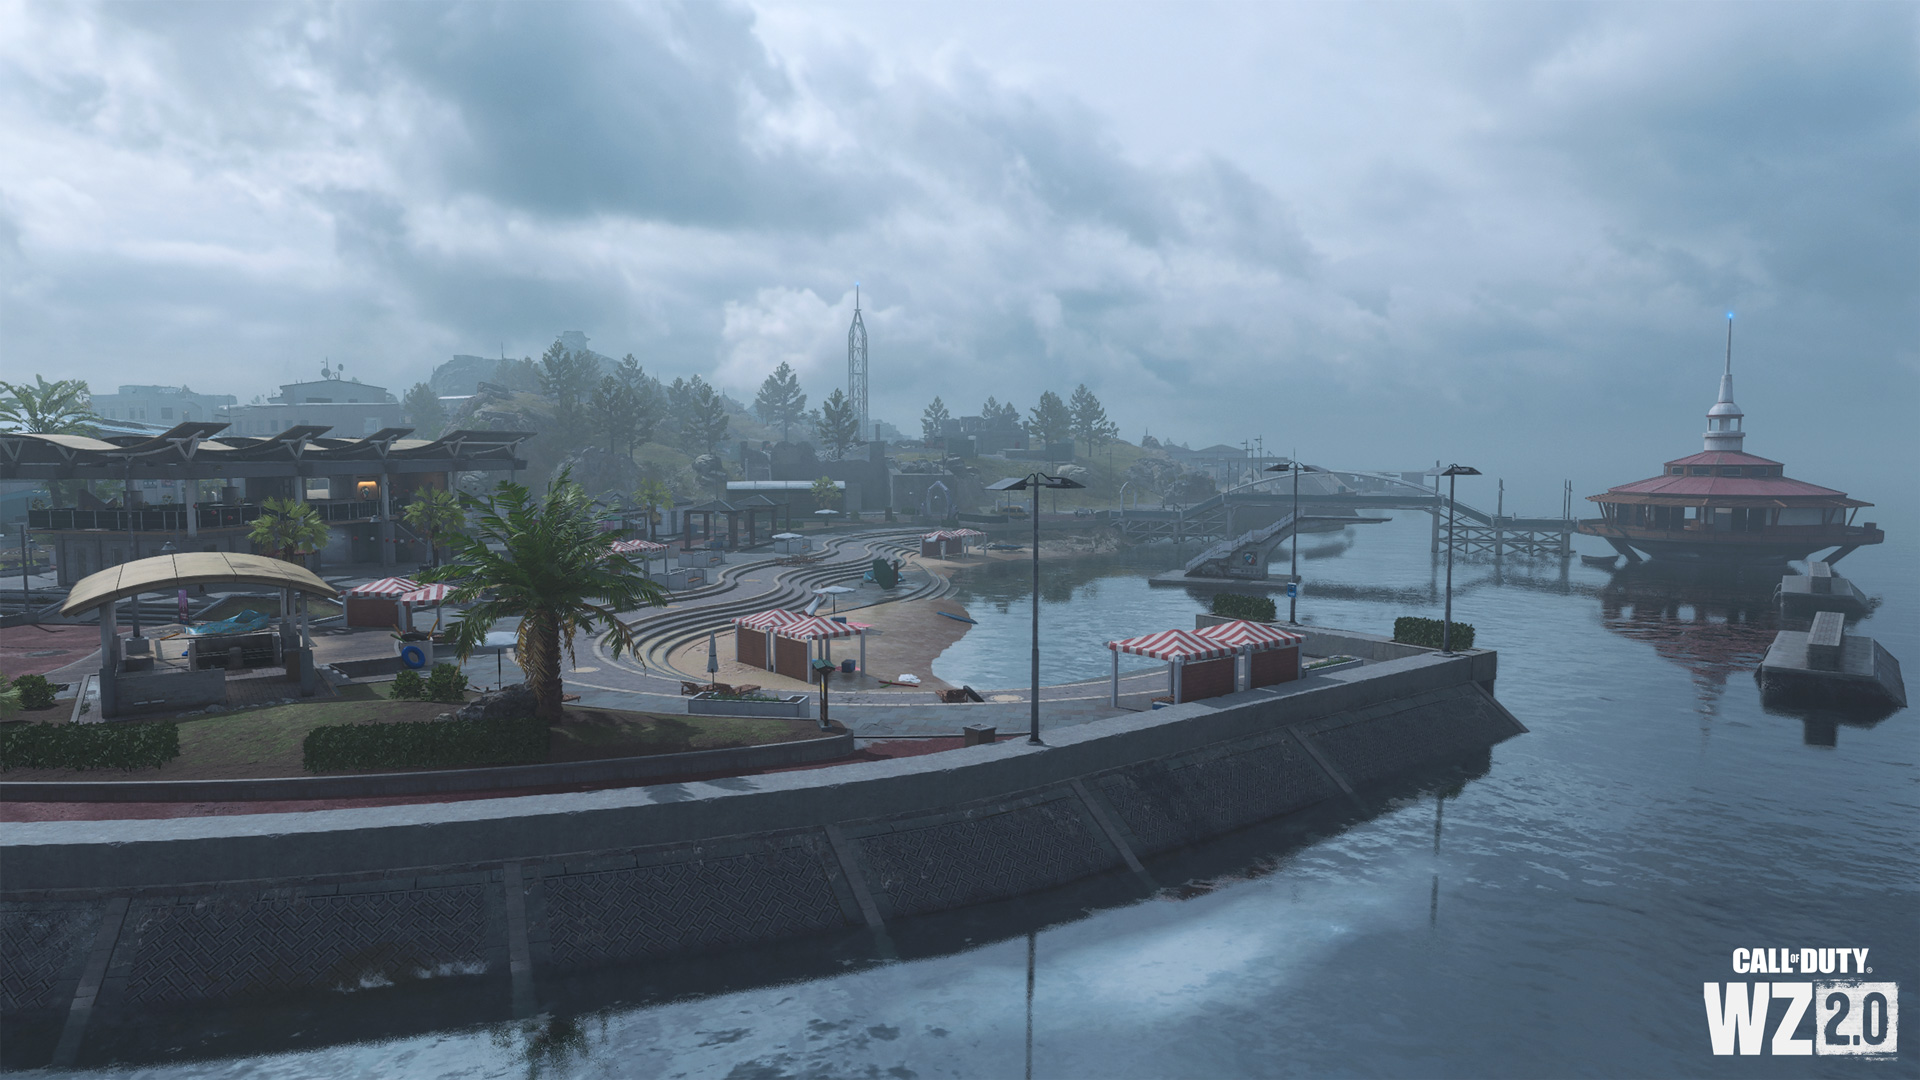
A wave of curved concrete shallow steps leads to a small beach, an ocean bay with a diving board surrounded by seawalls, a small parking area, and a pedestrian bridge leading to a pier with a circular Observation Point structure. What secrets are hidden below the central spiral staircase?
Demolition Site
The picturesque views of the Beach Club are only somewhat ruined by a demolition project on the bluffs above the club. Atop this bluff are the remains of a structure, now a half-destroyed collection of concrete and rebar. Note the pathways here to the Town Hall and up to the Castle.
Point of Interest: Tsuki Castle

The higher ground in the center of Ashika Island is dominated by an ancient castle with multiple fortifications and a natural defensive hill along the southwestern side of the structure. This is a large plateau with shallow, stepped battlements, cherry blossoms in bloom, and a scattering of secondary structures throughout the grounds. Look high for combat opportunities, but also look low; there’s an entire underground waterway and submarine base directly under this fortification!
Main Stronghold

Though the ancient walls of this imposing castle have been pockmarked by recent hostilities, there is still a maze of hiding spots, access points, and places to explore, both above and below ground. The inner defensive ring of the stronghold begins with a moat on three sides (the hills to the rest prevent the moat from connecting around the entirety of the base). A moat wall offers periodic openings into the bailey, leading to an inner walled “dojo” courtyard and adjacent structure with a radar trailer.

Back out in the bailey is a small outer building recently used as a barracks, and the main castle keep itself towering above the other structures. This roughly L-shaped structure has a central tower and two smaller, outer towers to explore, both along the tile roof awnings as well as the interior. The inside of the structure features large chambers linked with wood-walled corridors, a mezzanine level above the main operators room in the central tower, and a third-floor rooftop server room with views and exit options in all directions.
Northwest Battlements (SAM Batteries)

Northwest of the castle, above the Power Plant and parts of the Residential district, is a stepped hillside, atop which are a trio of hastily erected SAM batteries, low defensive walls that have seen some action, various containers and digging machines, and an old well. Might it be worth checking to see what’s at the bottom of this well?
North Museum Grounds
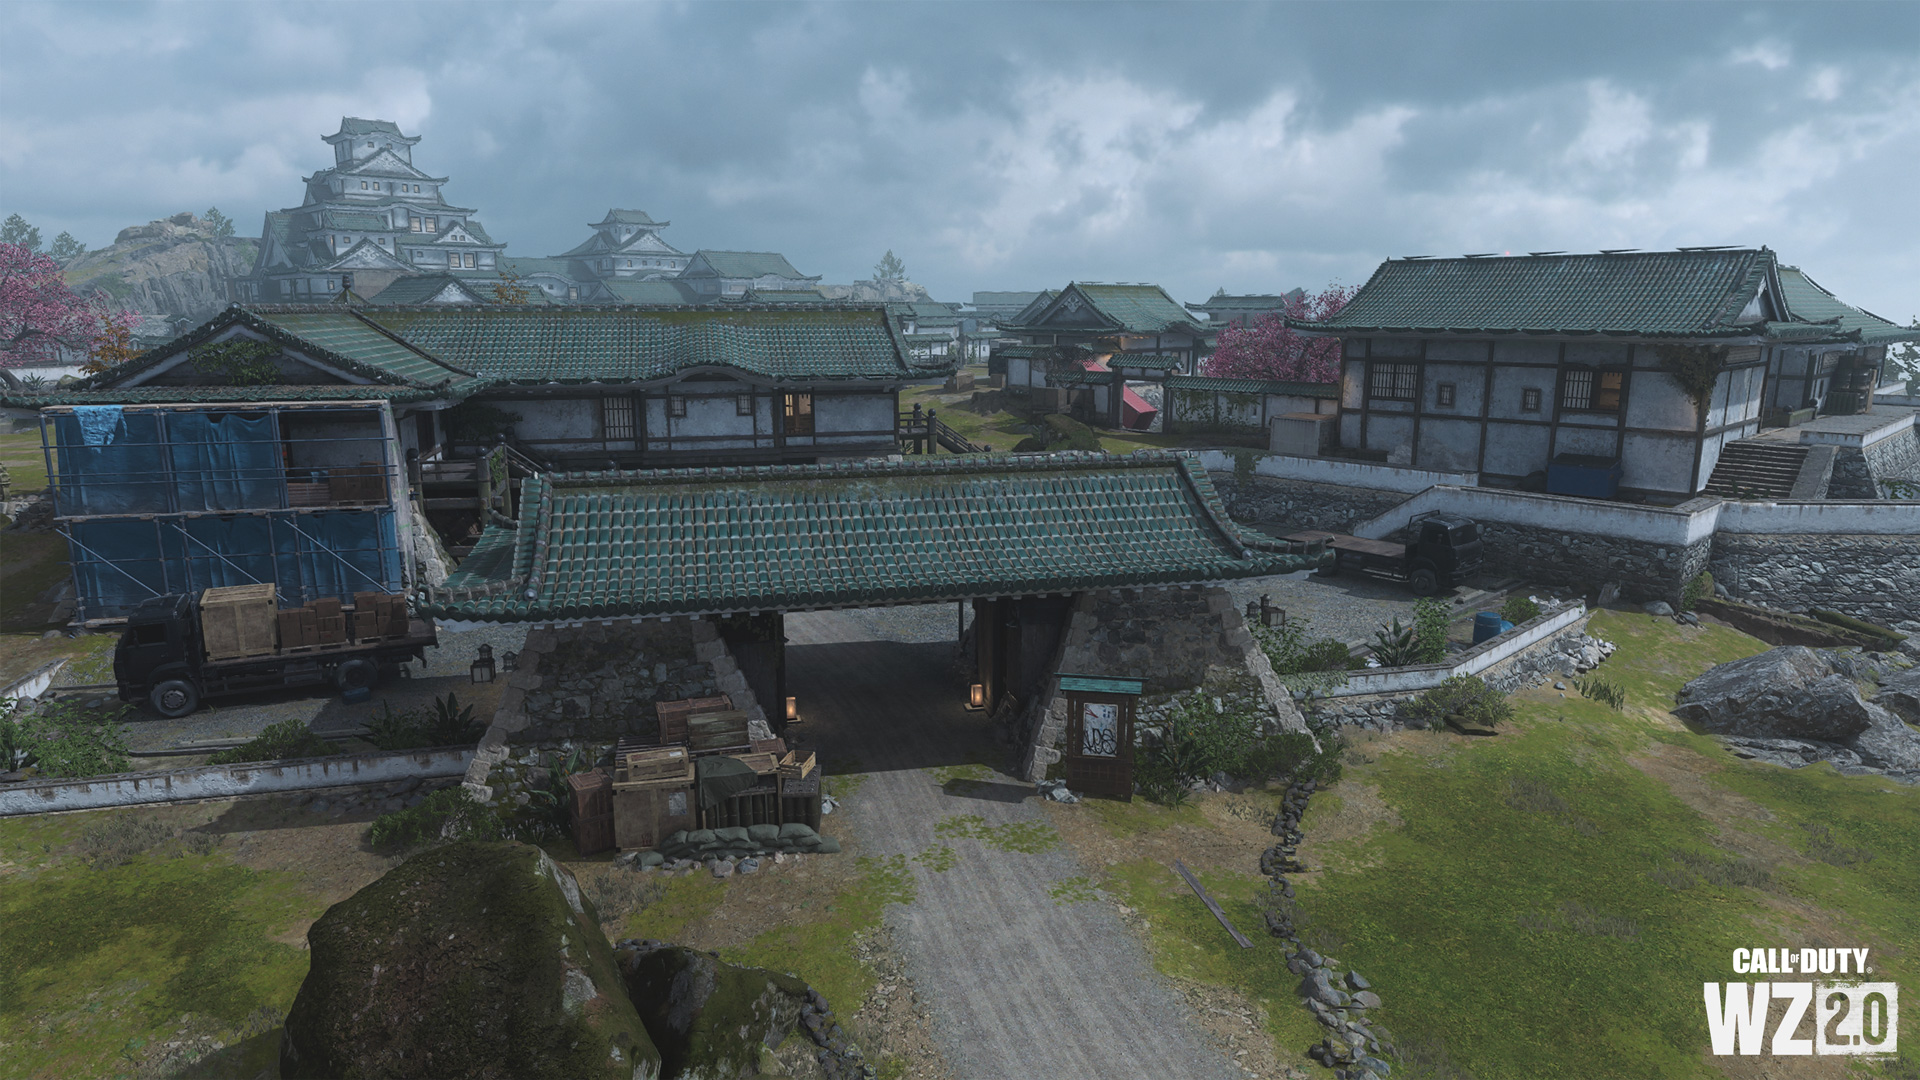
The old structures on the northern edge of the castle grounds consist of two main clusters; a walled museum with a courtyard, a ceremonial hut, two linked buildings with two floors, and several (usually ruined) display cases scattered throughout the corridors. Note the server room on the upper floor of the largest building. Further east is the northern and now main entrance into the castle grounds, a visitor center with a raised floor (allowing vehicles to pass under it) and quick access to the moat surrounding the inner castle grounds.
Southeast Gardens
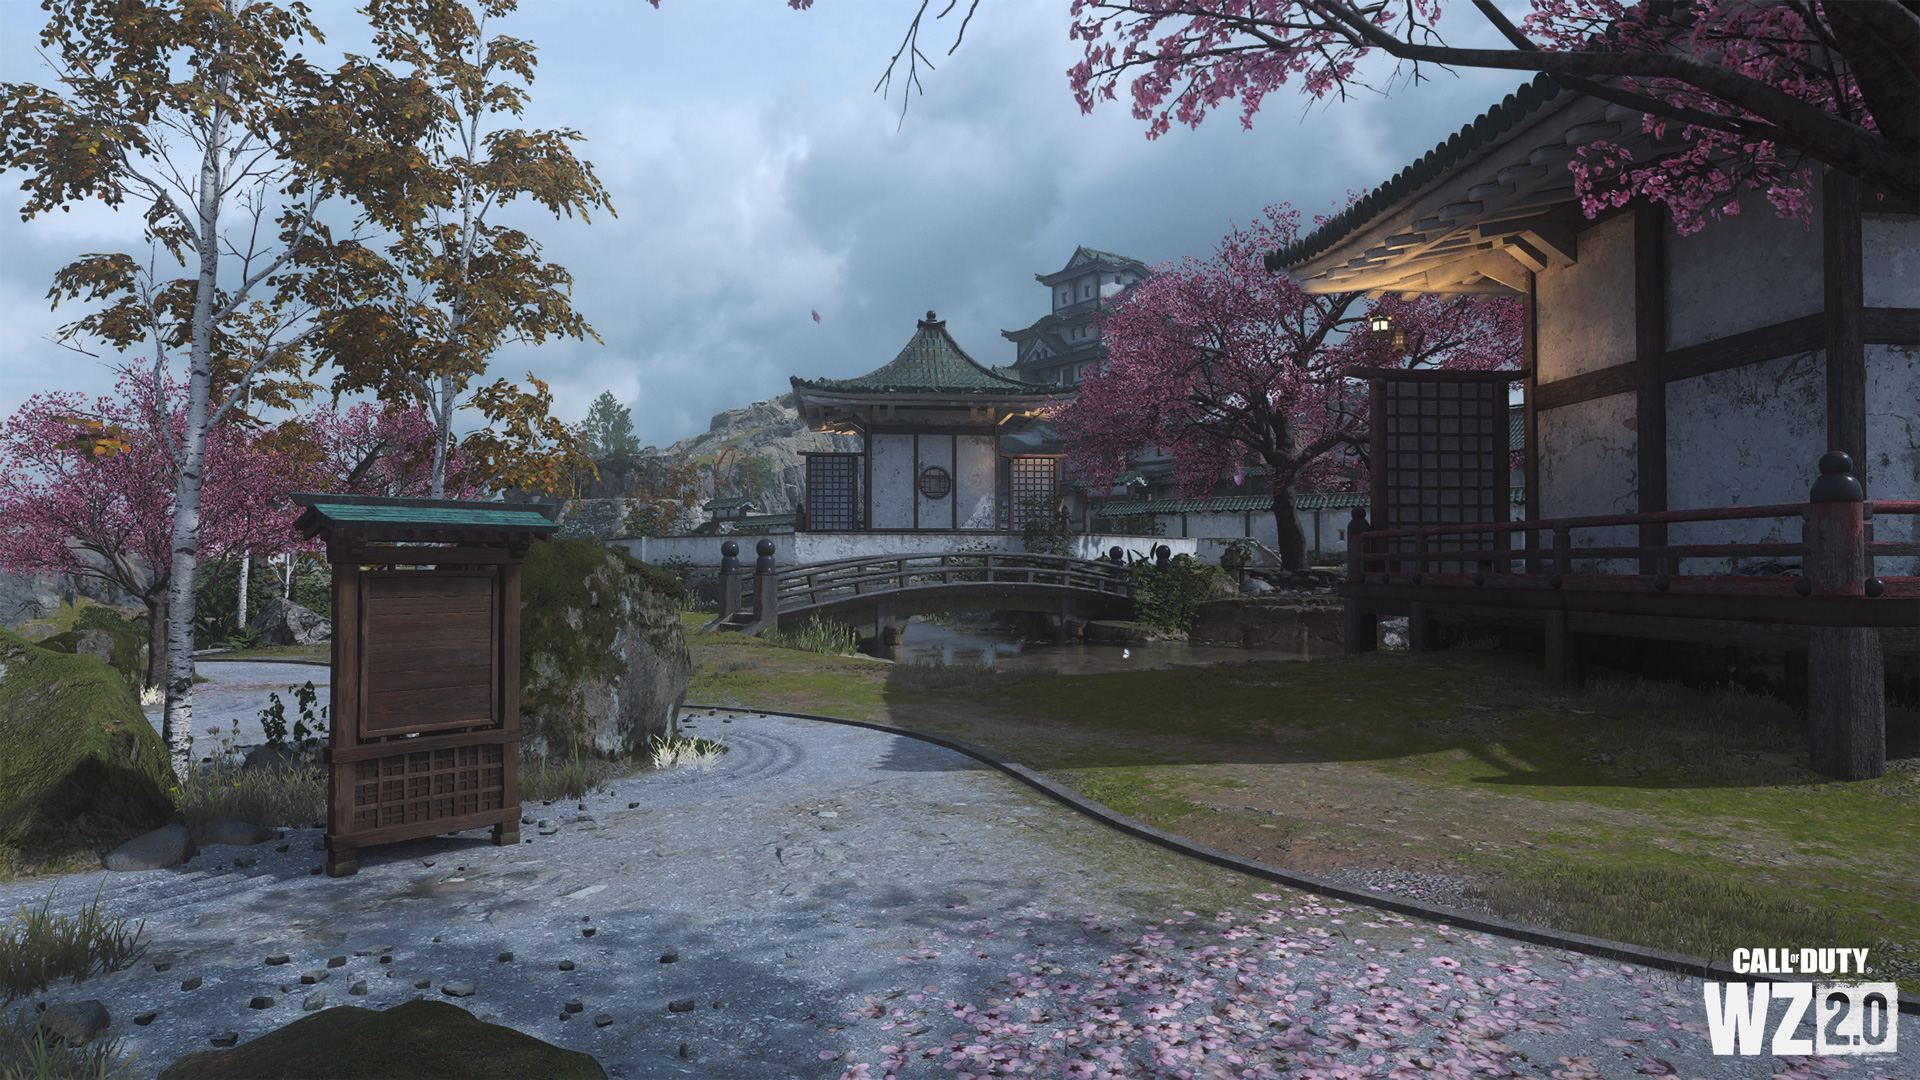
Prior to the recent combat operations, this edge of the castle grounds could be considered “tranquil”, with Zen gardens, maple trees, benches and ceremonial huts and bridges. Venture here to reach the ground above Port Ashika, or during skirmishes around the castle.
Waterways (Submarine Base)

Carved from the rock under the Castle is a sprawling subterranean tunnel system known locally as “waterways”, offering an underground route from the west (Town Center), north (Water Treatment) and east (Port Ashika). Don’t make the mistake thinking there aren’t many additional insertion points allowing Operator access to and from the castle grounds above. Swim or pilot an aquatic craft through the interconnecting canals, with a central submarine dock and many other alcoves and hidden routes to find and explore.
Point of Interest: Port Ashika
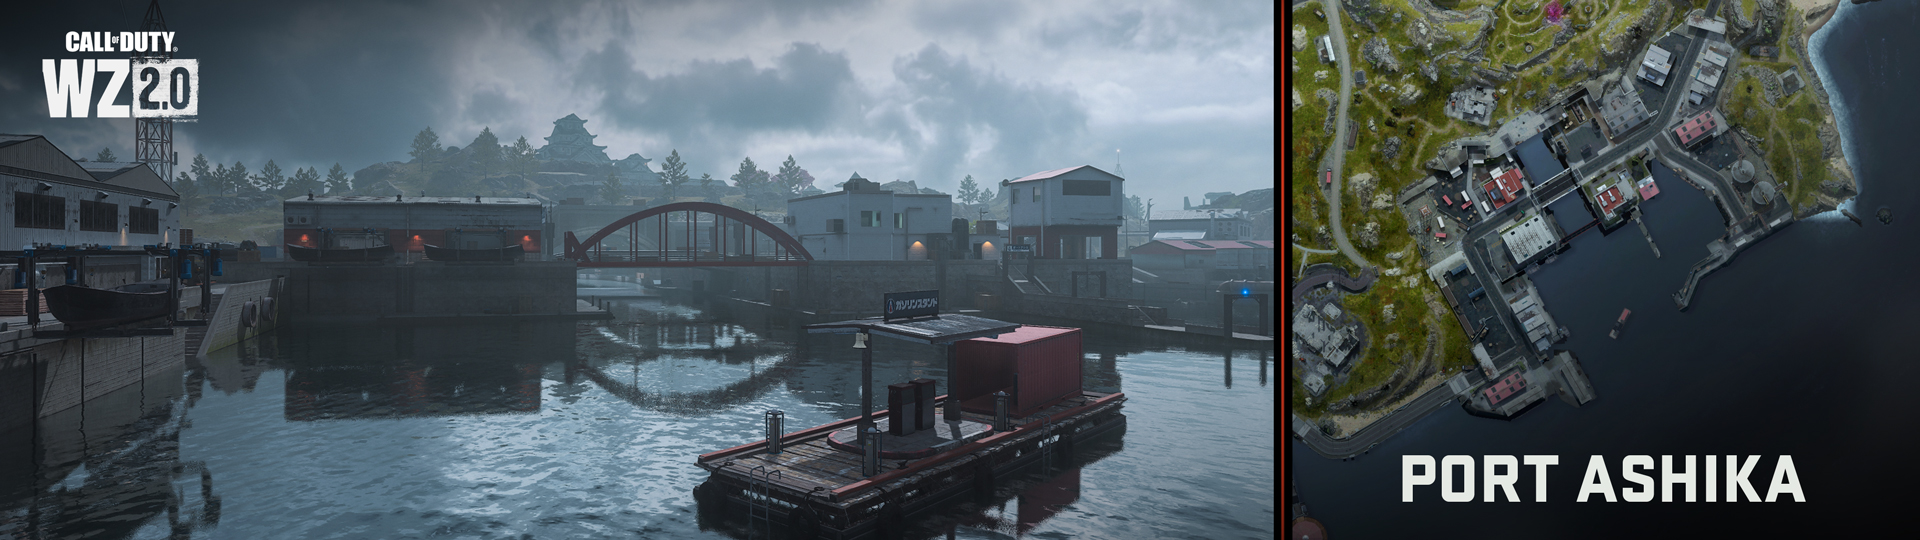
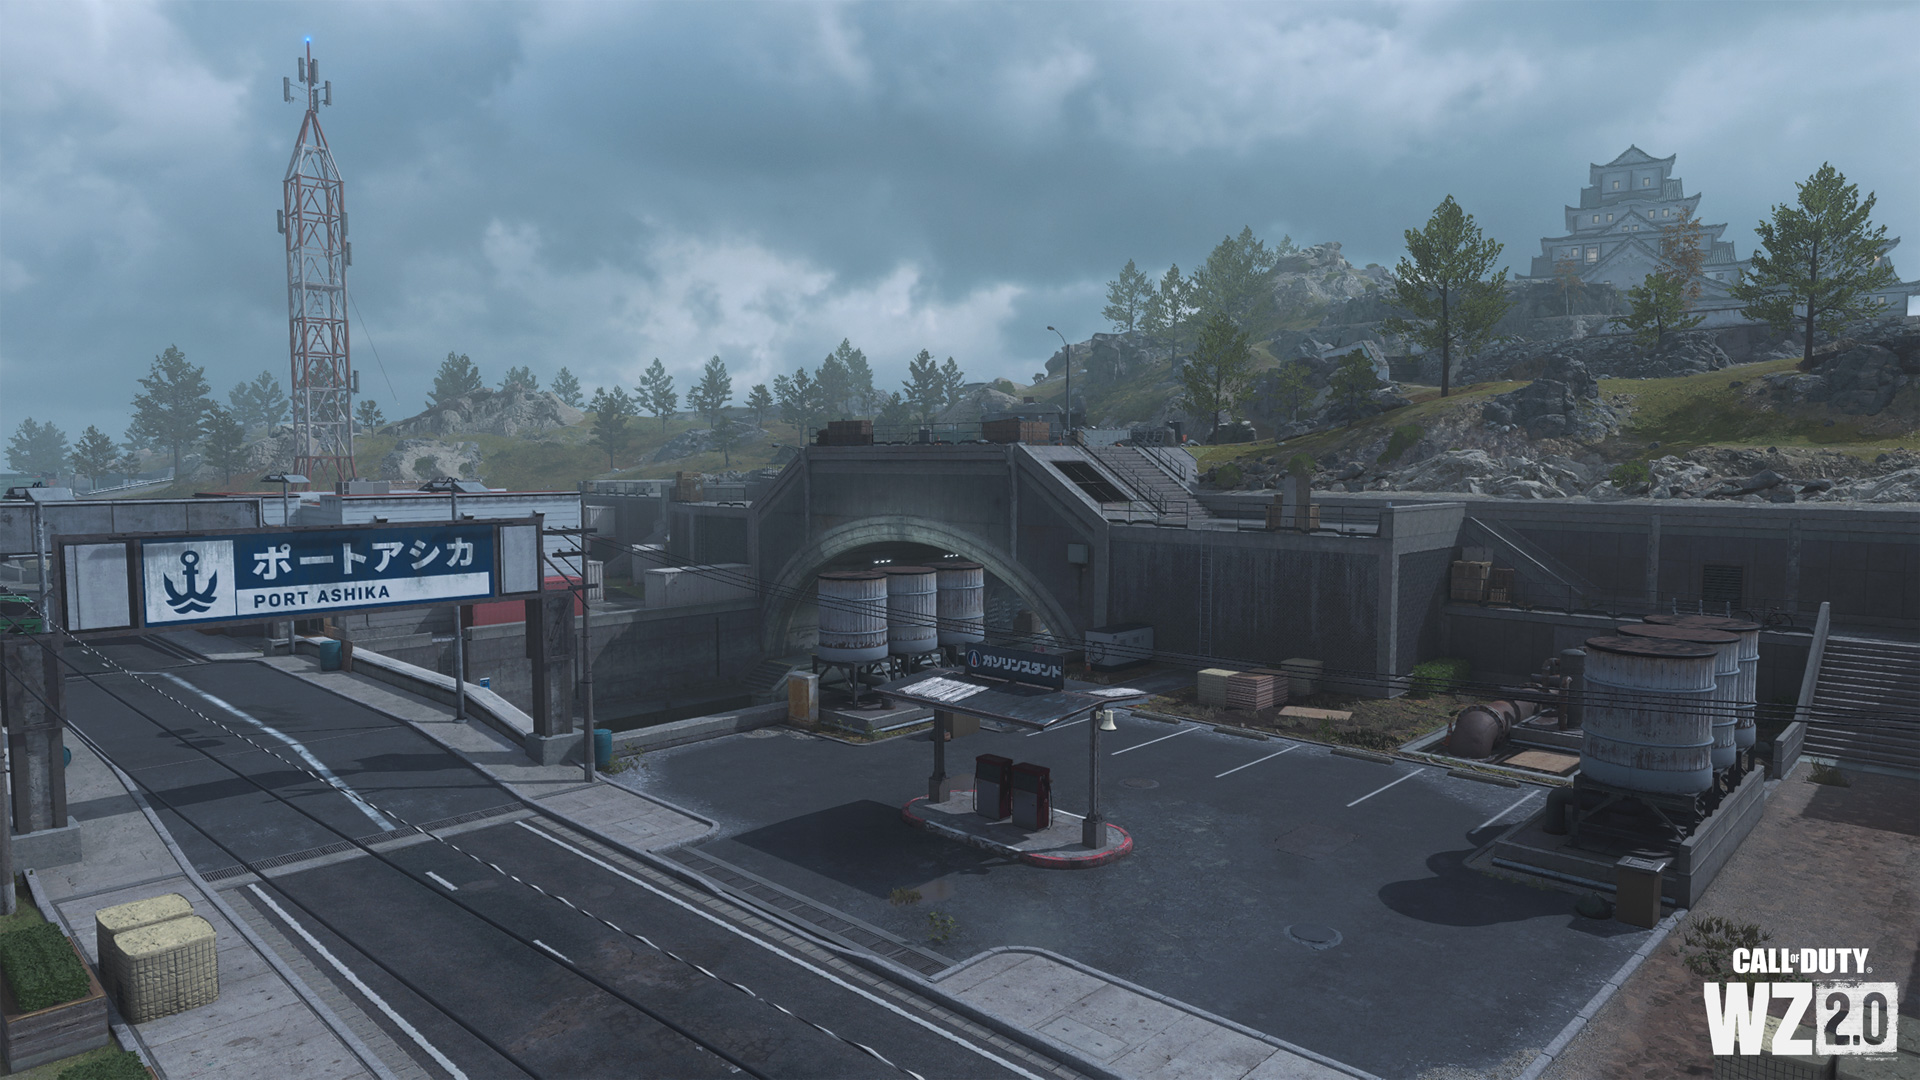
The southwestern edge is dominated by rocky bluffs, and a port named after the island. There’s steep terrain to the north as you venture to or from the castle, and a variety of industrial warehouses, offices, a comms tower as you venture towards the ocean, as well as a canal entrance to the subterranean submarine base.
Humpback Bridge

The main tarmac loop around the perimeter of the island takes the form of a short, hump-backed bridge as the road leaves the Beach Club and you reach the entrance to Port Ashika. Watch for foes under the bridge!
Dockside and Warehouses

The industrial yard to the west of the canal bridges consists of storage warehouses once you pass through the main entrance hut and covered barrier. Close by is a red-roofed structure (boating repair and storage), two dockside boat storage open structures, a boat launch, and a larger warehouse with two open bays. A small parking lot leads to a storage container yard and a Comms Tower (one of three on the island).
Canal: River Channel and Control
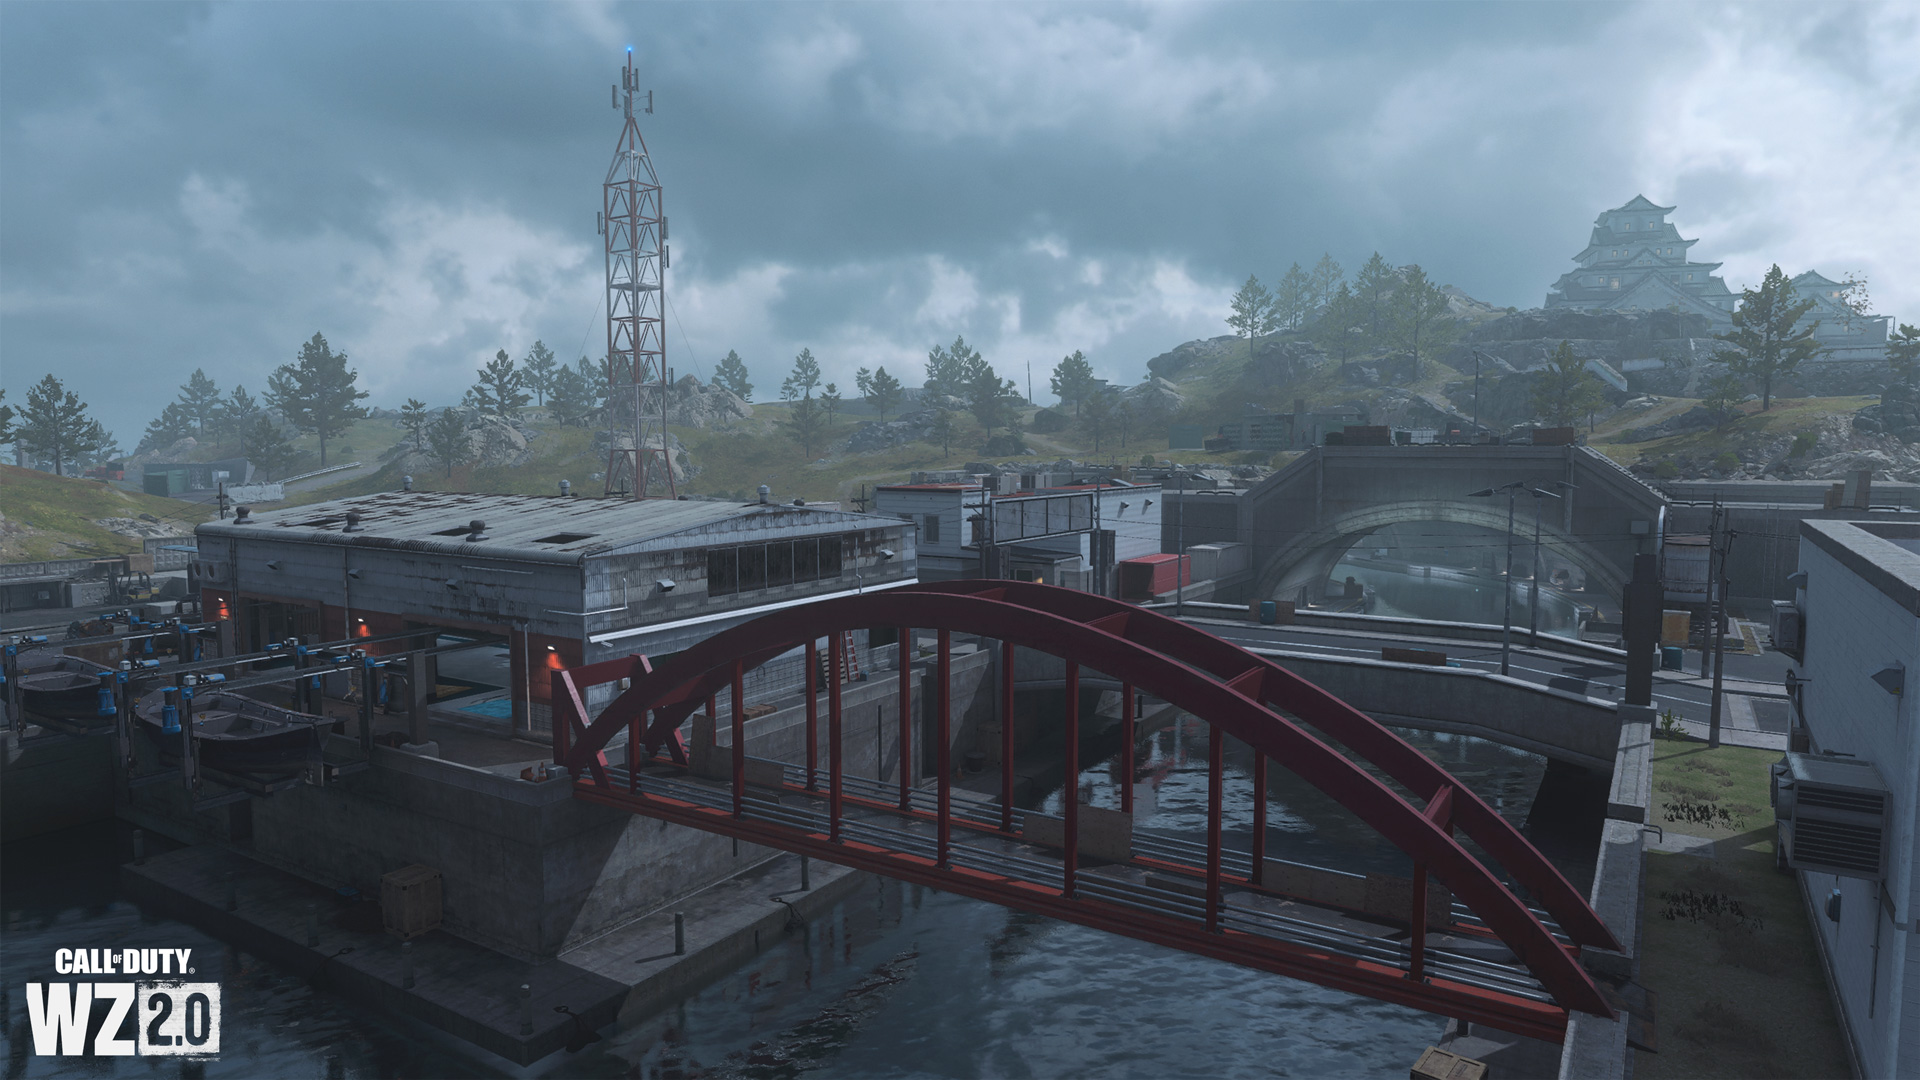
Close to the bridge over the road canal is a harbor master’s building and a large warehouse with two boat lifts, close to the red pedestrian bridge. This canal separates the two sides of the Port, and the canal leads directly into the sprawling, underground submarine base below the Castle. To the northeast of the red bridge is the Control building, with server rooms and offices nestled along the shoreline.
Ashika Bay and Floating Gas Station
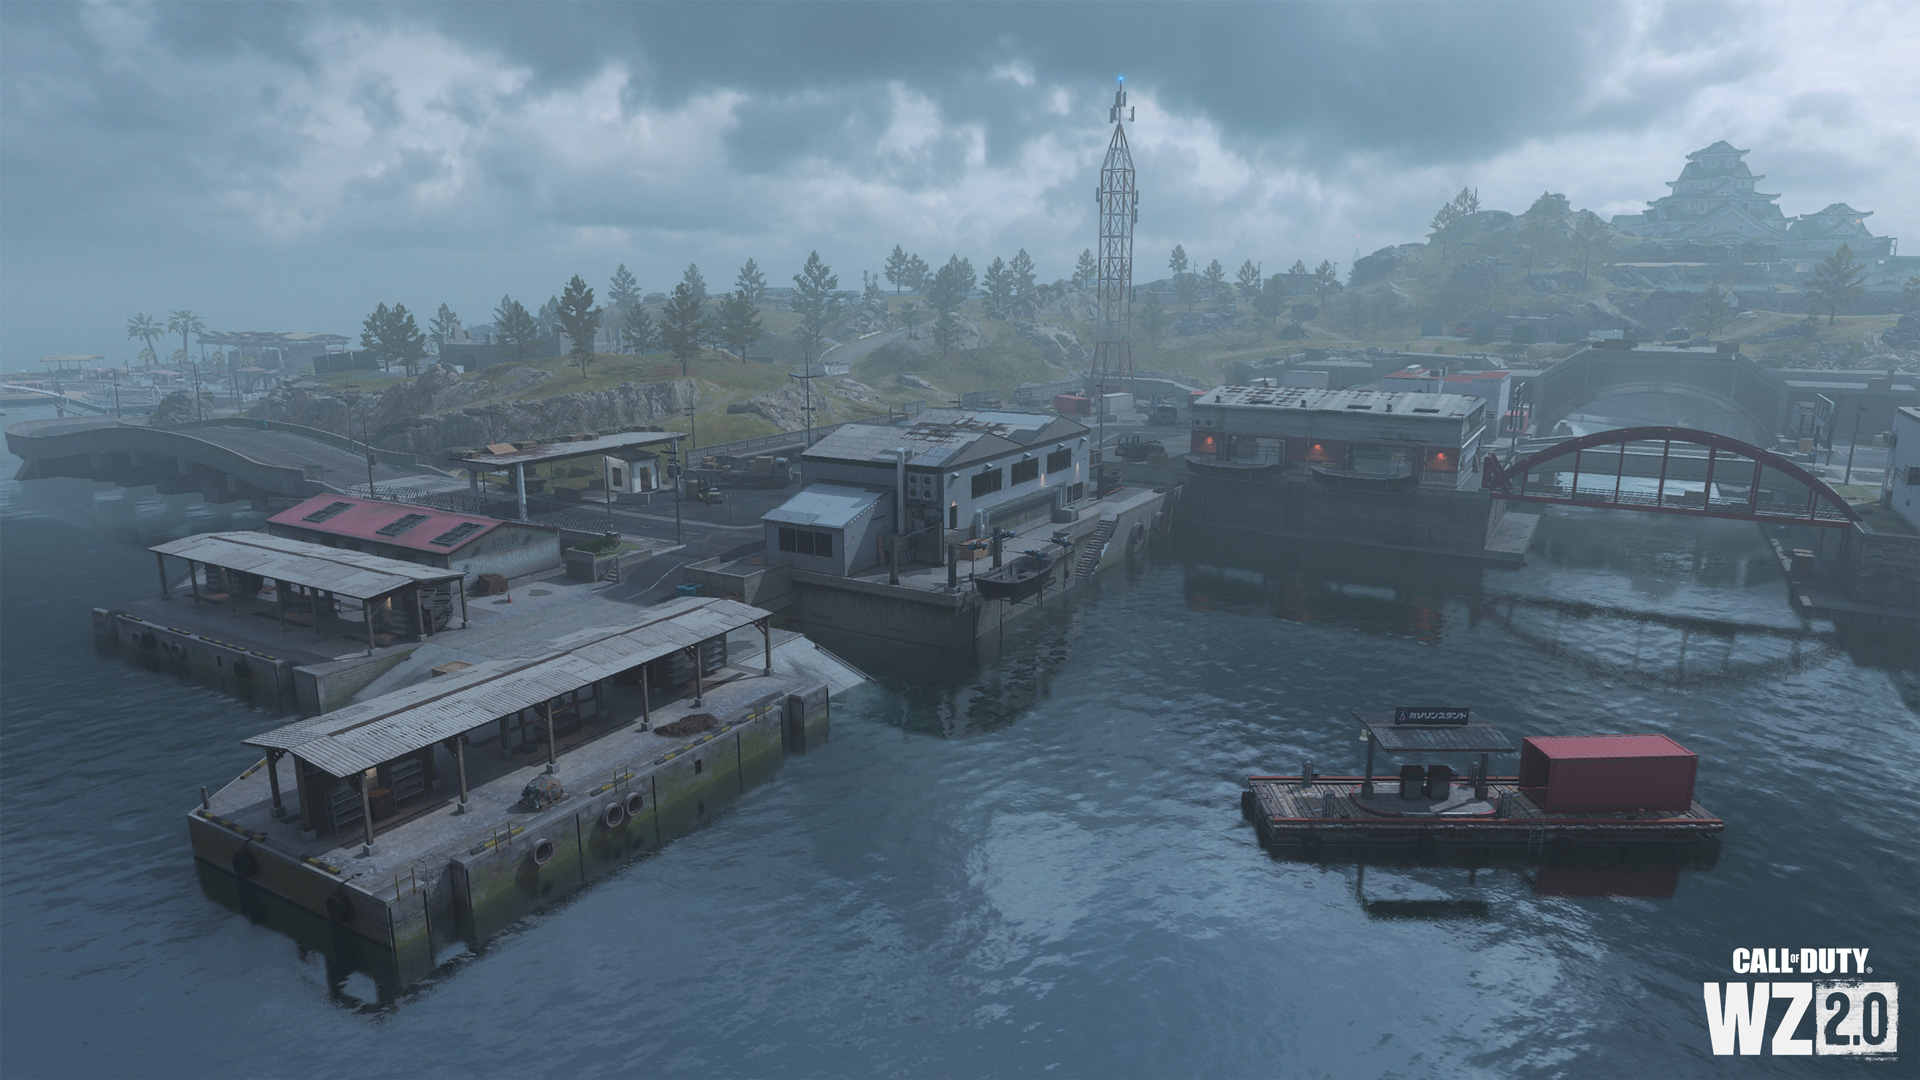
Impressive sea wall defenses limit the ferocity of the waves and grant this harbor a placid atmosphere… until battle commences. Watercraft can easily refuel here at the floating pontoon with an attached Gas Station. There are numerous boarding points to the main island, and obviously, the canal enables you to speed (via aquatic craft) into and out of the submarine base.
Gas Station
Offering good access from the main road and poor access if you’re driving down from the Castle battlements, this Gas Station sits next to the Canal, across from the Control building.
Mechanics Yard and Oil Vats
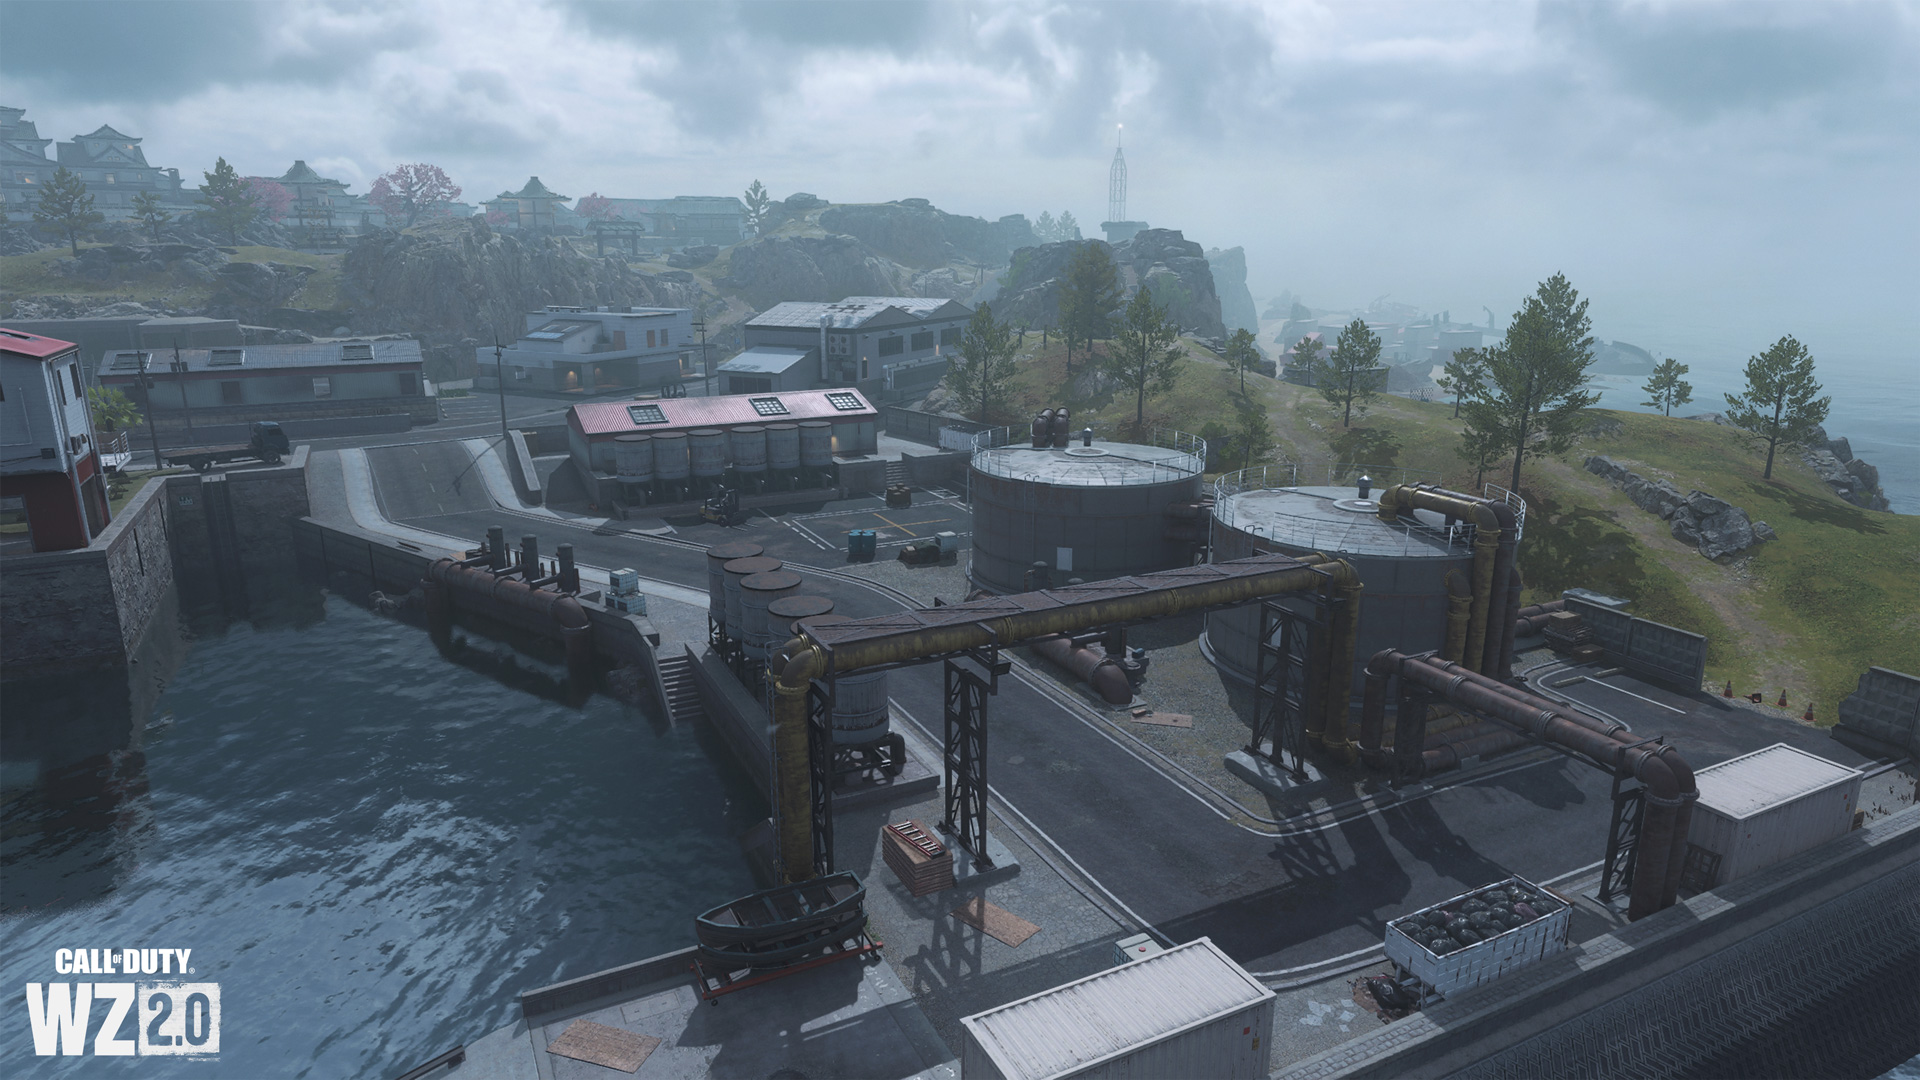
The northeastern side of Ashika Port offers a quartet of medium-sized warehouses mainly filled with mechanical parts. The slightly elevated building has boat parts, a two-floor office, an open bay warehouse by the road entrance and barrier, and a lower, red-roofed structure with oil vats in the exterior parking lot. Additional vats of oil waiting for pumping and seaward transportation are close to the water’s edge. Note the grassy bluff and pathways between the edge of these buildings and the rocky beach.
Rocky Bluffs

A small picnic area and tall rocky bluffs shroud the eastern road exit and offer good views of the containers strewn about the beach to the northeast. Watch out for (or become) an ambusher in these parts, as the viewing is restricted.
Point of Interest: Residential
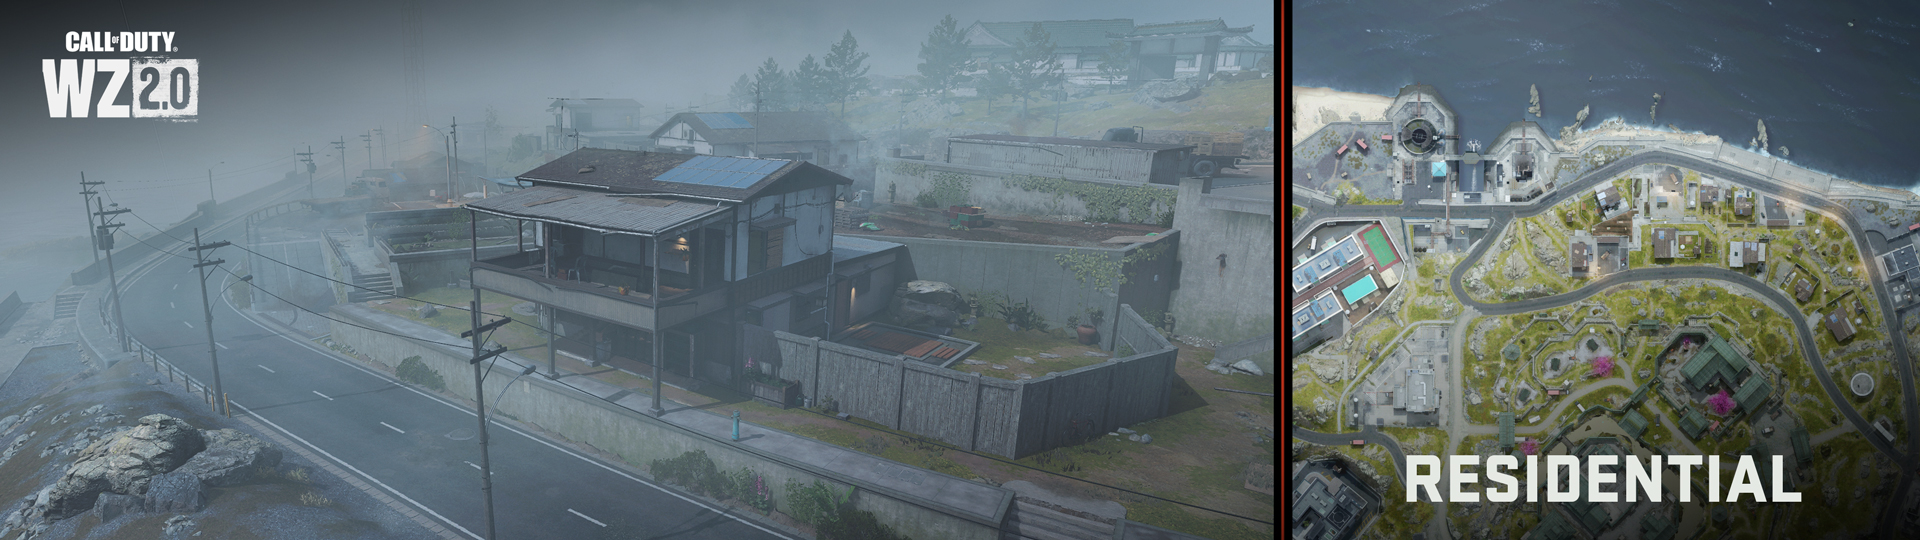
On the lower ground below the castle battlements to the north and east of the Farms and allotments sits some residential housing between a couple of industrial structures (a Power Plant and Water Treatment Facility). Easily accessed (and surrounded by) tarmac roads, there are plenty of places to discover, both over and underground.
Apartments
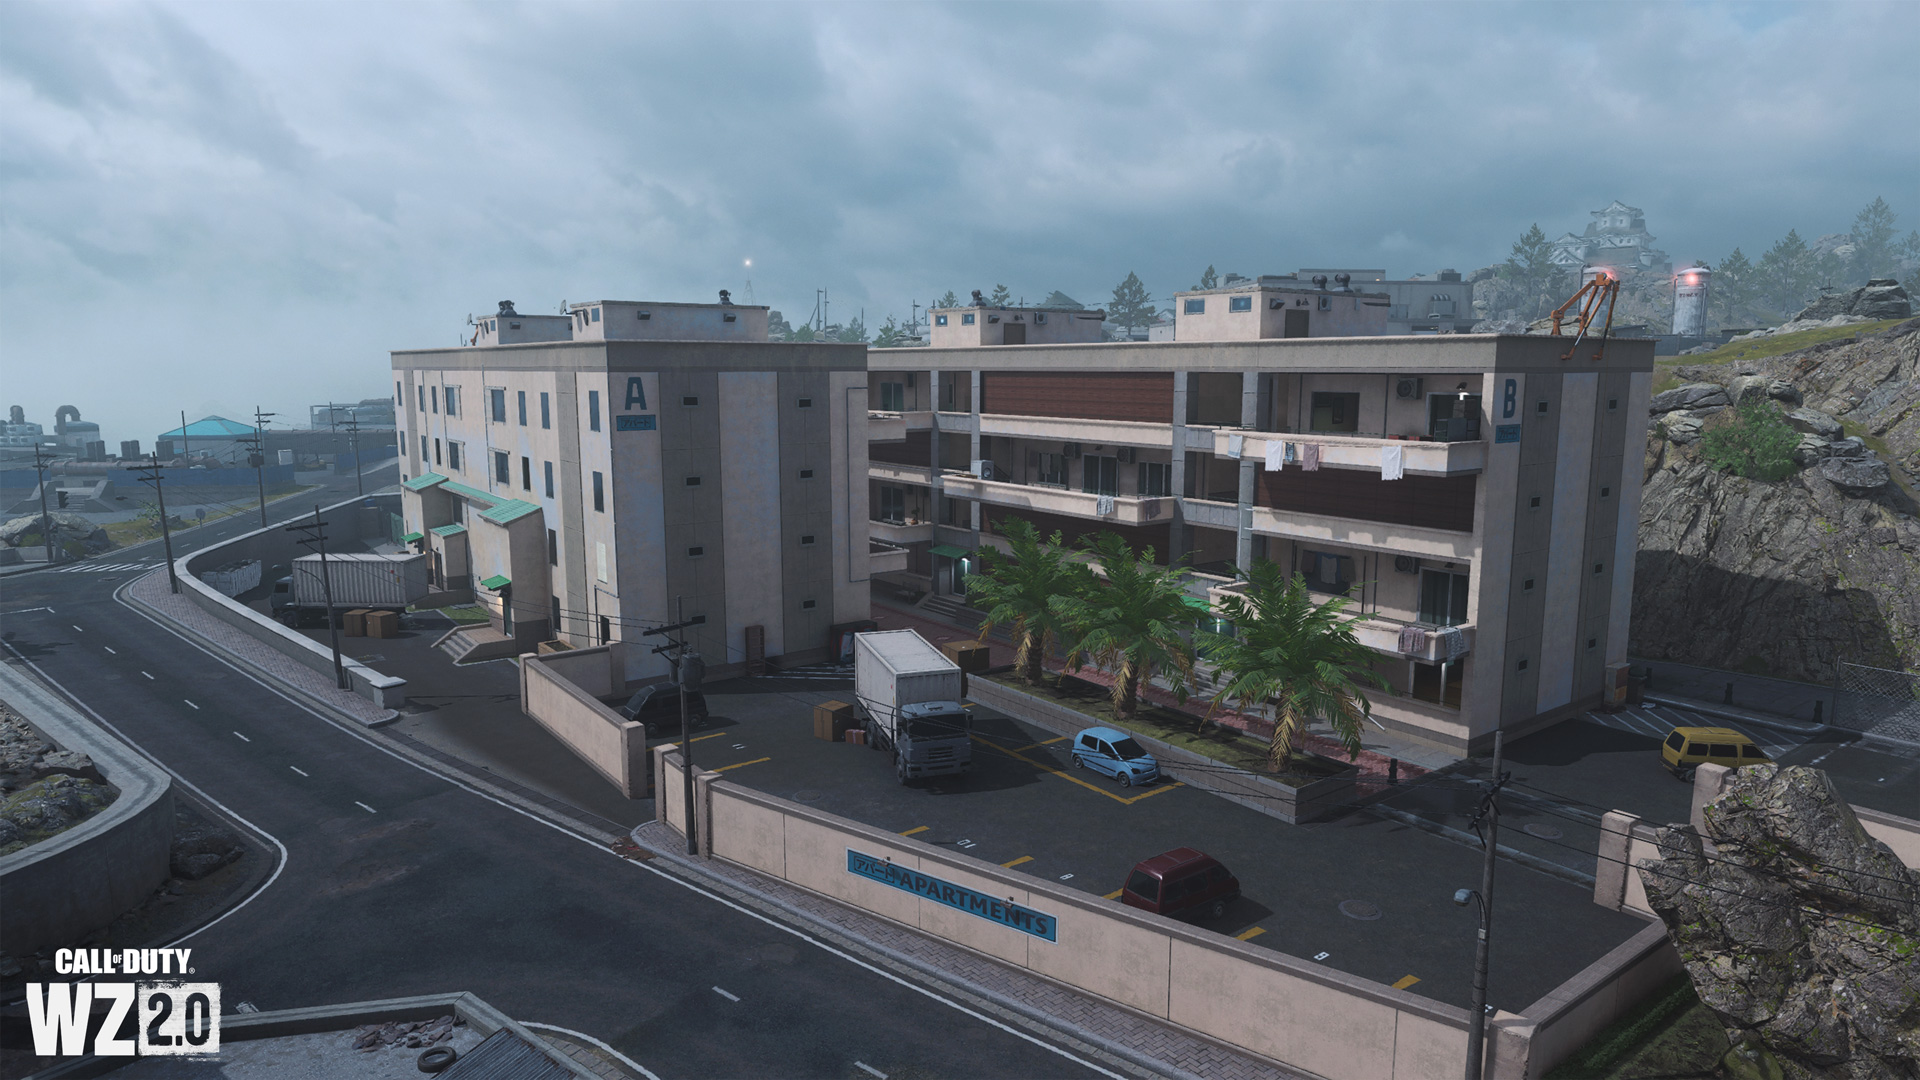
West of the main Residential homes and surrounded by a low wall is a small apartment complex. Each pair of apartment structures (labeled A and B) rises four floors tall, with a roof, interior stairwell, and inside access. The grounds are composed of a barbecue area, a swimming pool, and a tennis court.
Power Plant

West of the Castle, in a roughly triangularly shaped yard surrounded by a mesh fence, is the Plant providing electricity for the entire island. Inside is a sizable turbine generator. Current cartographical evidence suggests an access tunnel linking the Water Treatment Facility to the northeast.
Water Treatment Facility
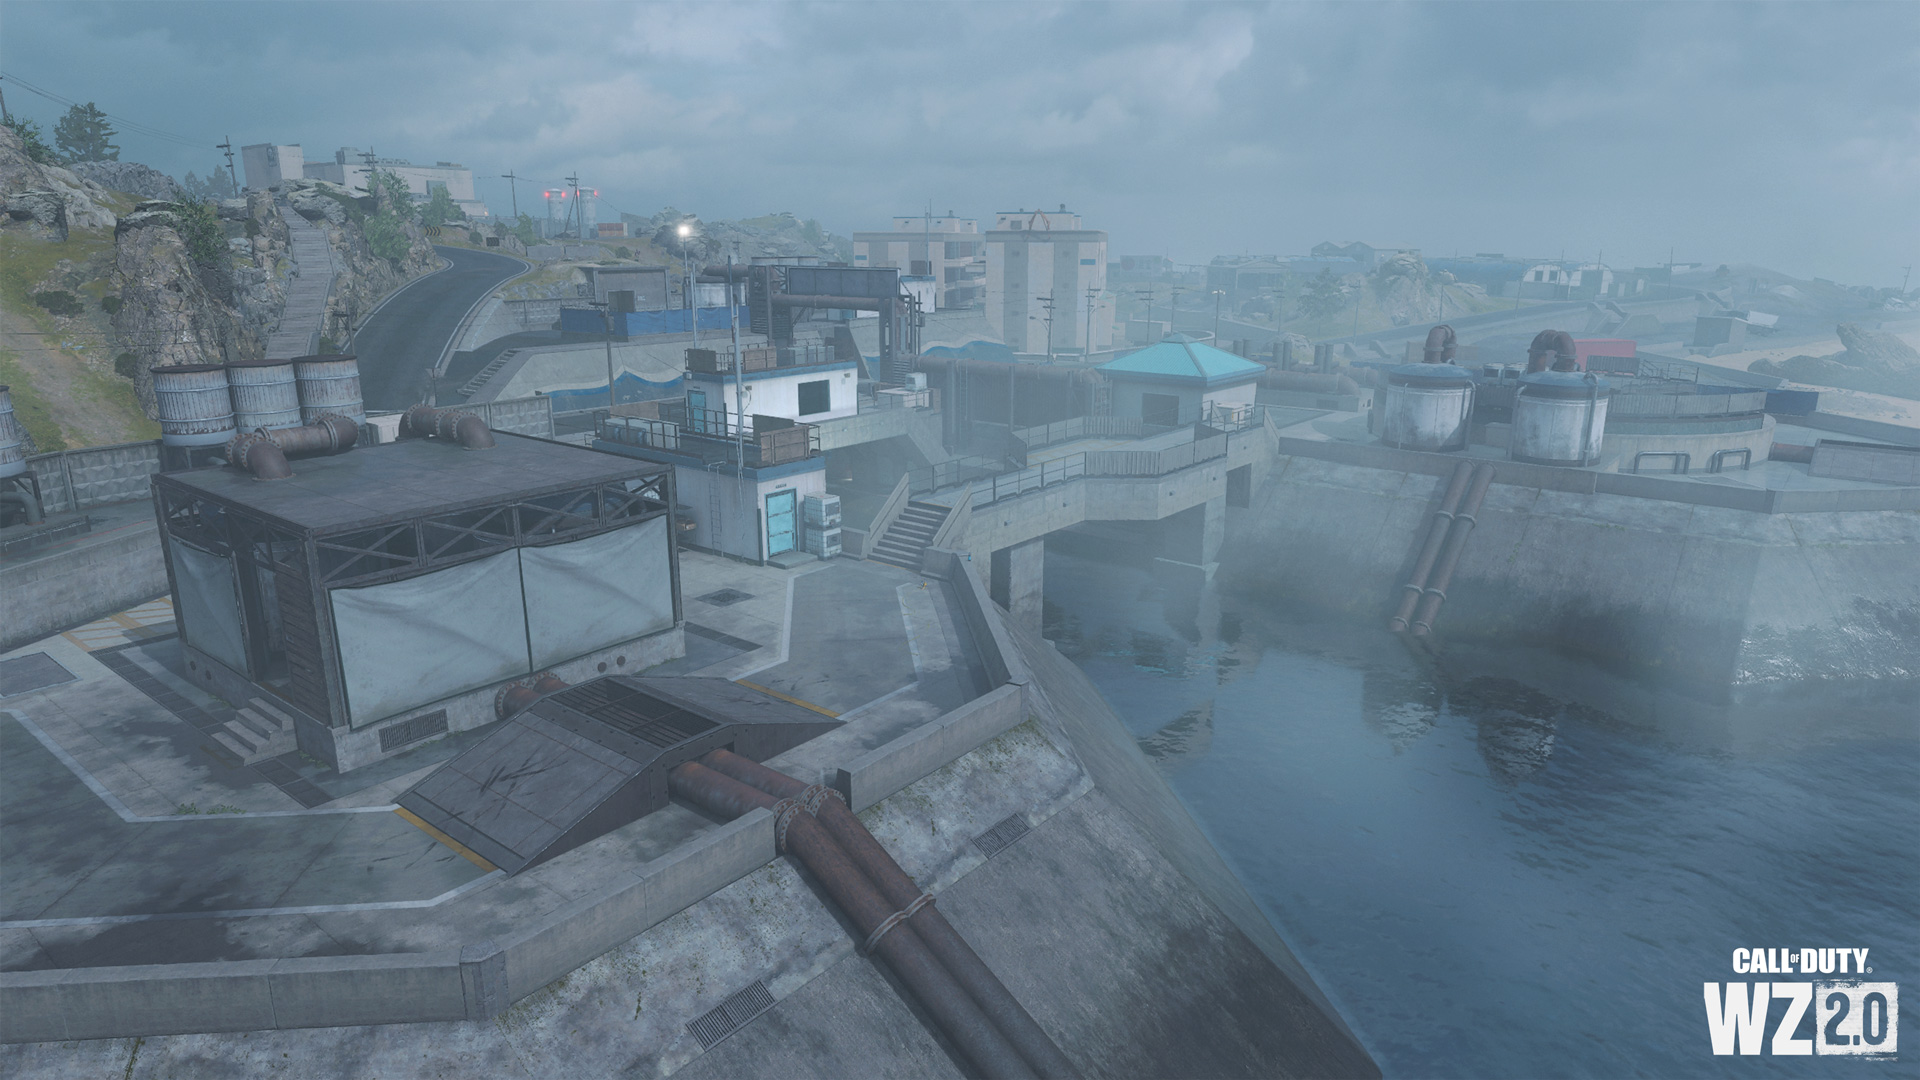
In the center of the northern coast of the island is a small water treatment works, along with a third canal entrance into the subterranean waterways. Up on the surface is a sewage vat, a trio of container and hut-shaped offices, and (after crossing the road) are the upper pump works, with a small office and an entrance into a hillside tunnel. This tunnel may offer clandestine to the power plant and a drop down into the waterways.
Residential District
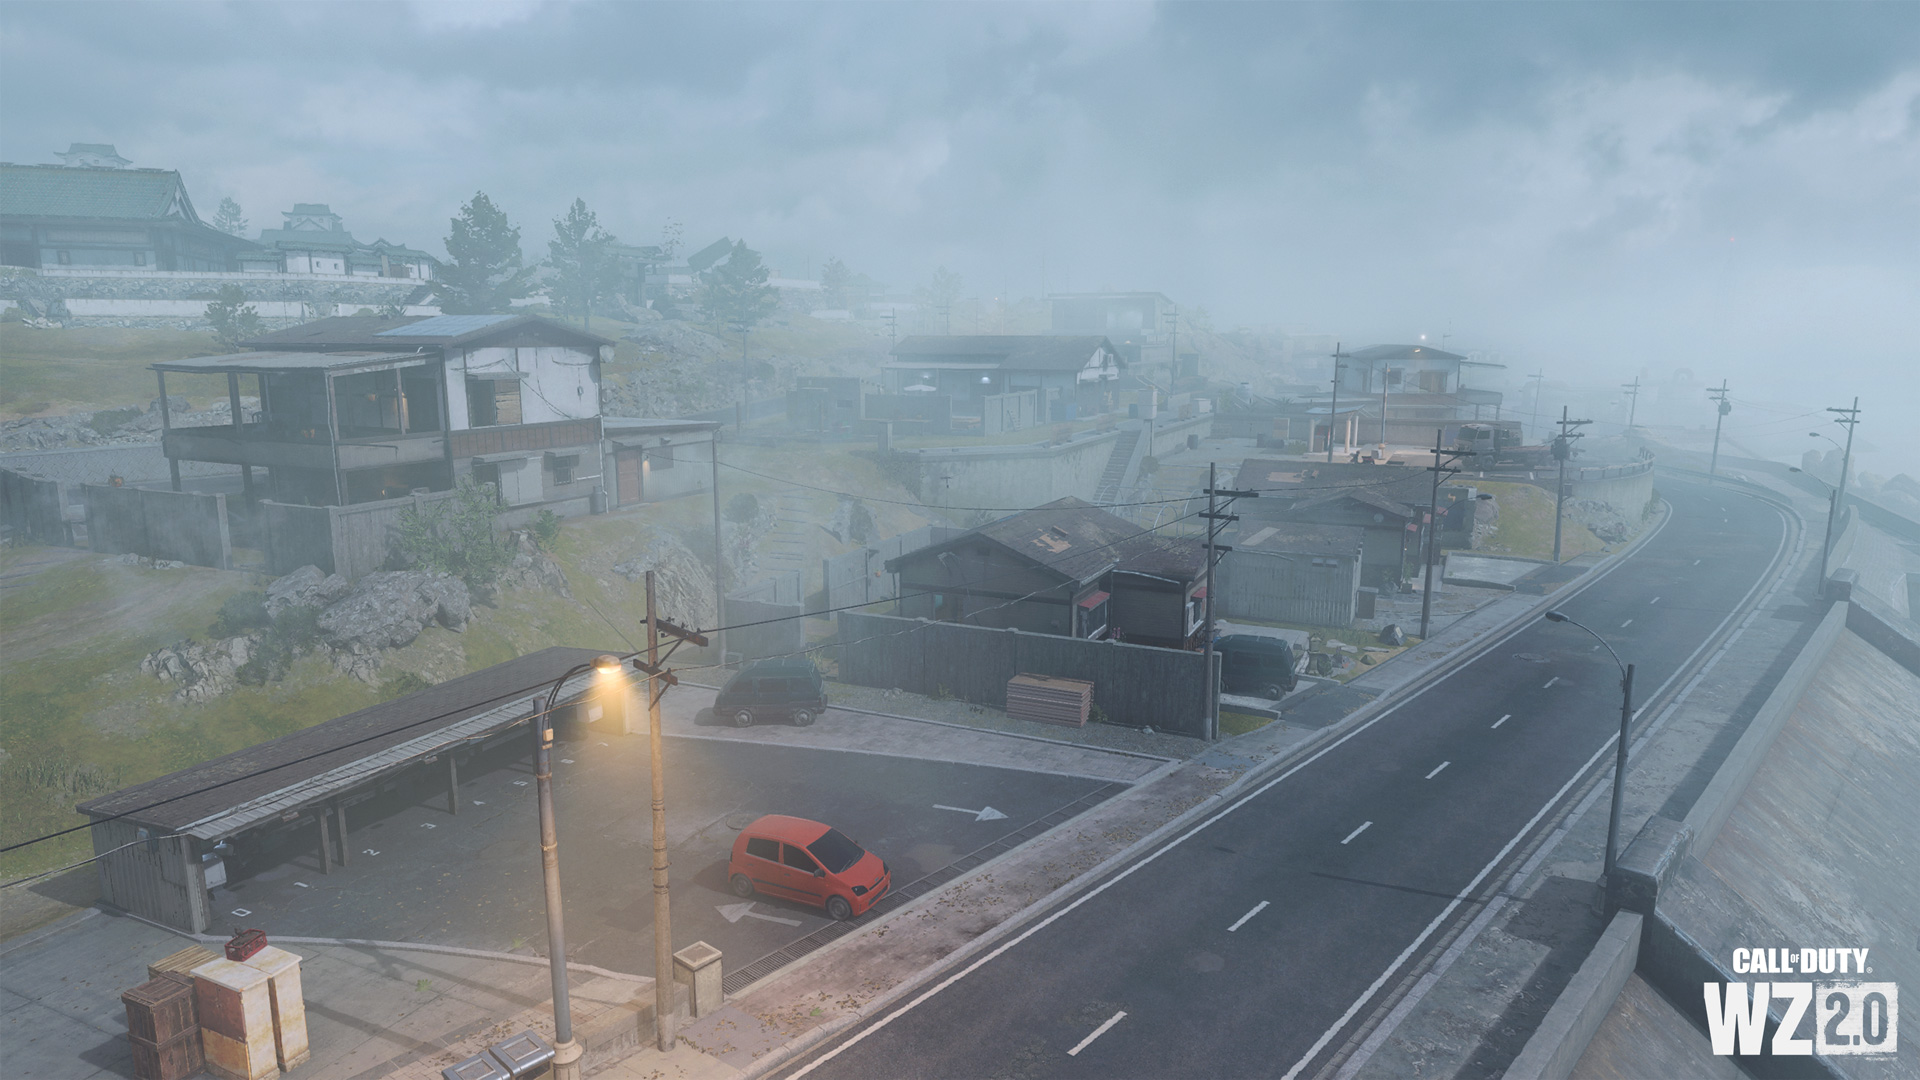
A sliver of rocky ground north of the castle has been developed into a small residential district, sandwiched between the water treatment facility (west) and comms tower, and gas station (east). Main roads surround the collection of modest wooden dwellings, all with some interior access. Some structures have two floors, while others are single-level. Southeast is a circular restroom building and a bus stop en route to Shipwreck and Port Ashika. This area of Ashika Island is defined by a thin layer of fog, which reduces long-range visibility and sight lines in specific situations. While it will not affect fast-paced, close-quarters combat situations, snipers should plan accordingly.
Point of Interest: Shipwreck

The inclement weather and hazardous shoreline spelled doom for two cargo tankers. Both vessels have run aground here, and the containers they were carrying have been mostly saved and stacked in a pleasing manner. Further northeast are cliffs and the main looping tarmac road, as well as a comms tower and lookout above a gas station.
Beached Cargo Tanker

Down from the rocky, cliffside crags and across the windswept beach is the first of two identical cargo tankers that beached here and are currently rusting away. The vessel is badly listing towards the ocean, but the hull is intact.
Beached Cargo Tanker

The remains of a rusting shipping vessel remain in skeletal form on this part of the rocky coast. The shipping containers the tanker was carrying have been mostly offloaded. Note the hole in the hull of the superstructure.
Containers
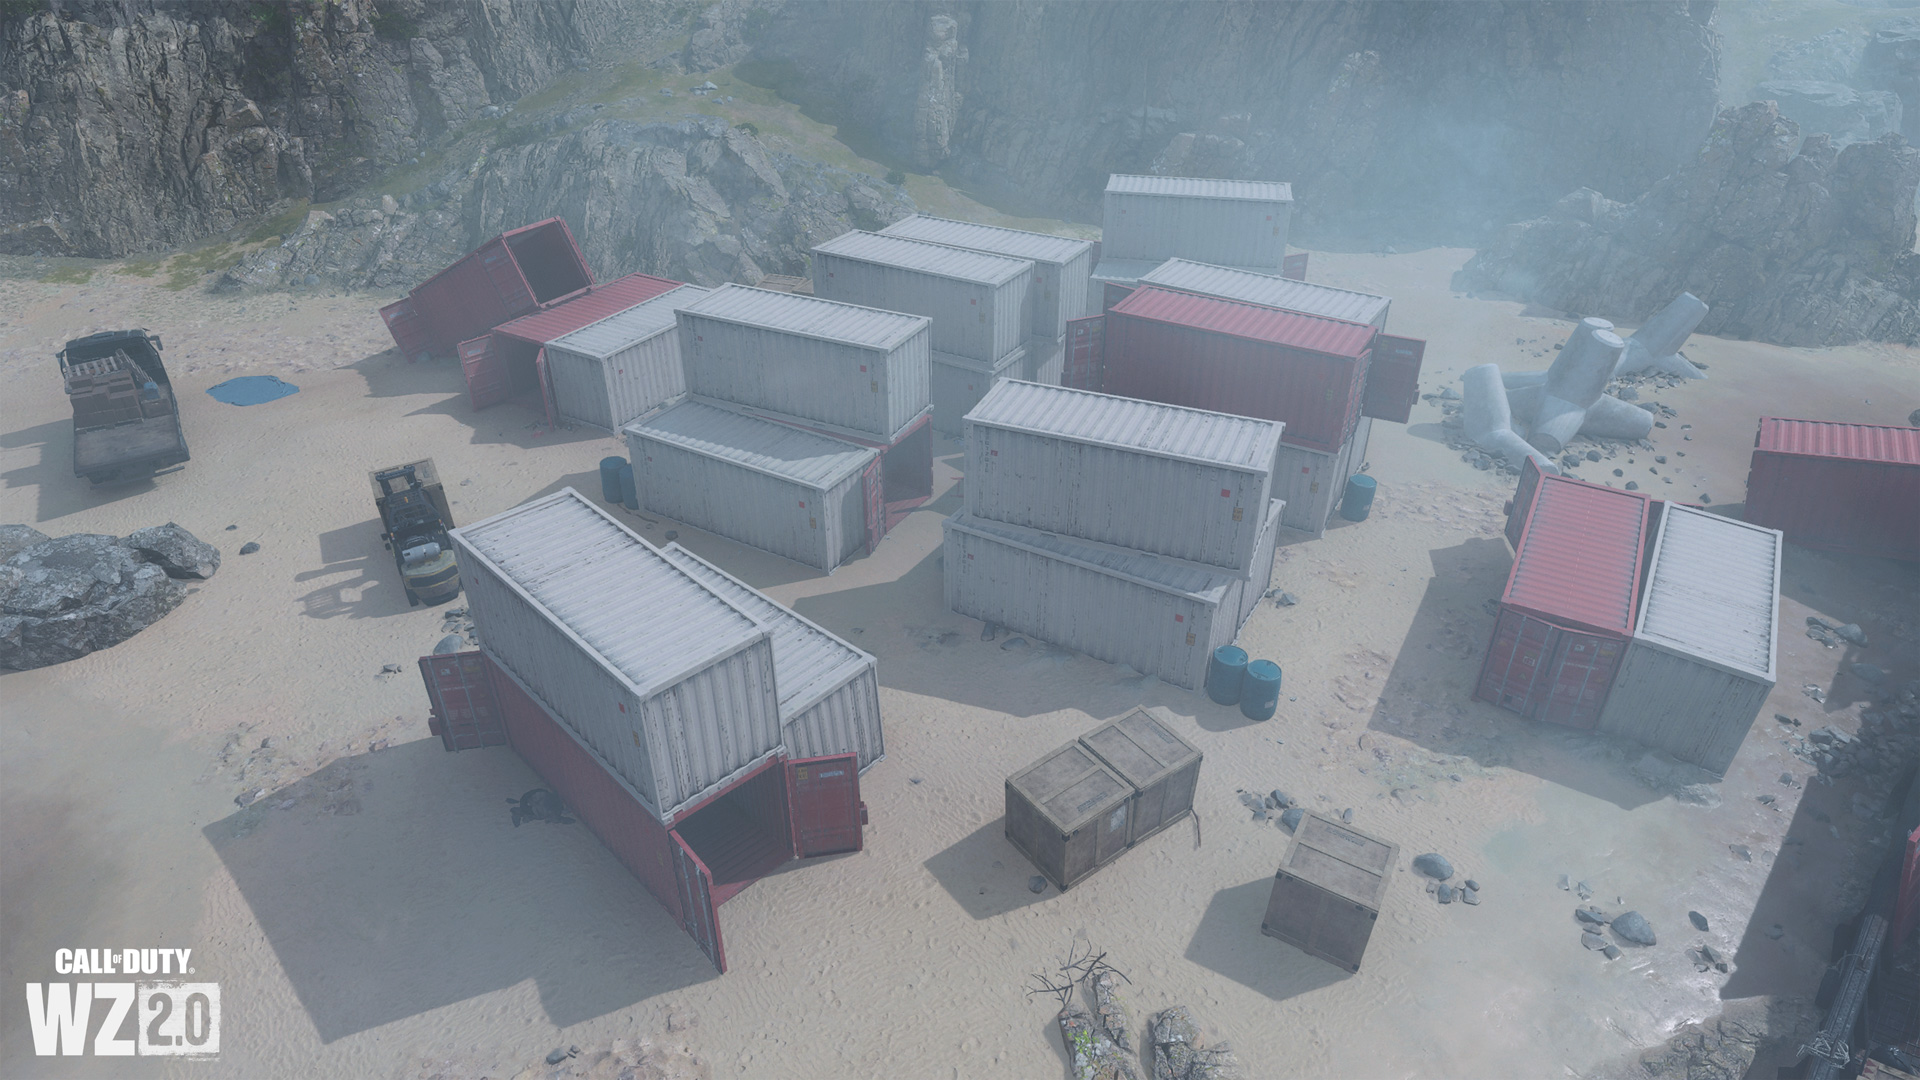
At the base of the rocky cliffs are the empty shipping containers from the two tankers that have run aground in the vicinity. Local haulers have arranged the containers in a familiar and pleasing pattern….
Clifftop Demolition
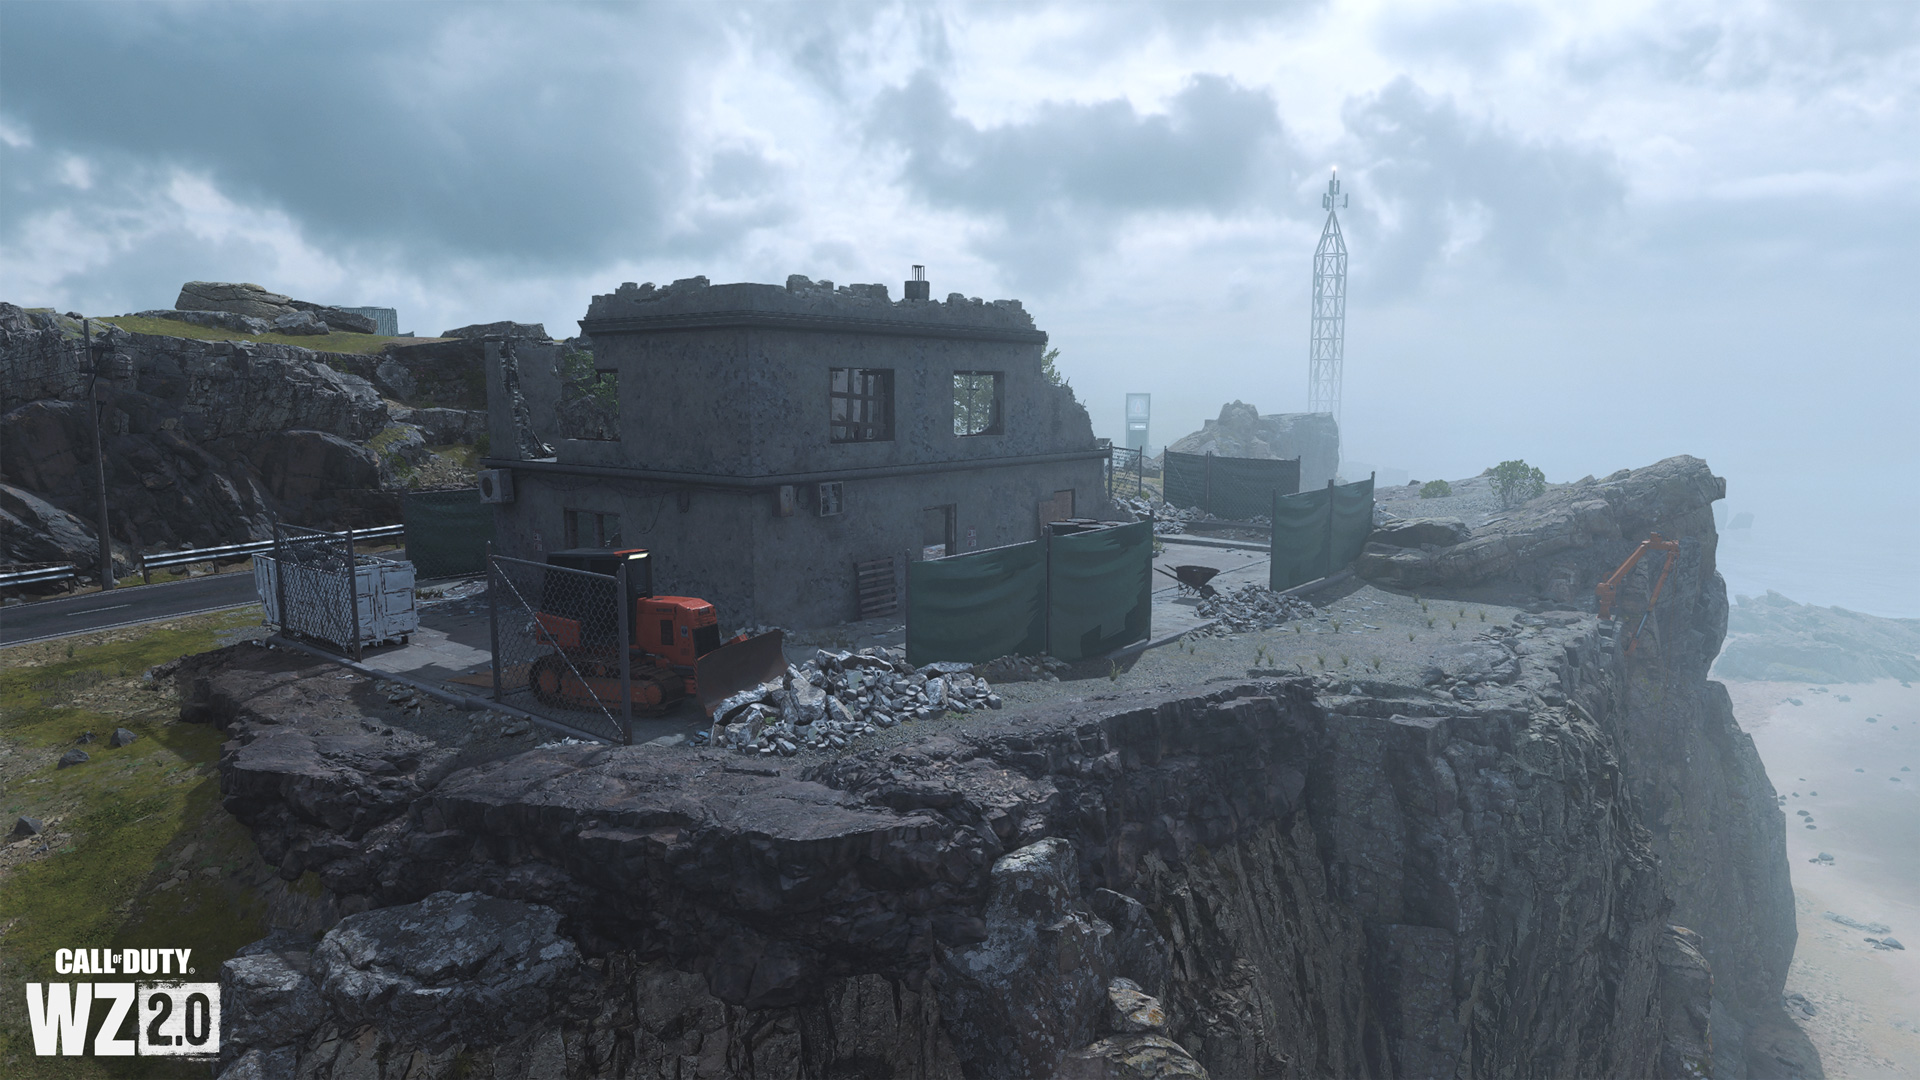
An old concrete building is undergoing demolition, and the place is in ruins, though the height and views around make this an interesting place to gain the high ground or ambush foes along the main road.
Lookout Point and Gas Station
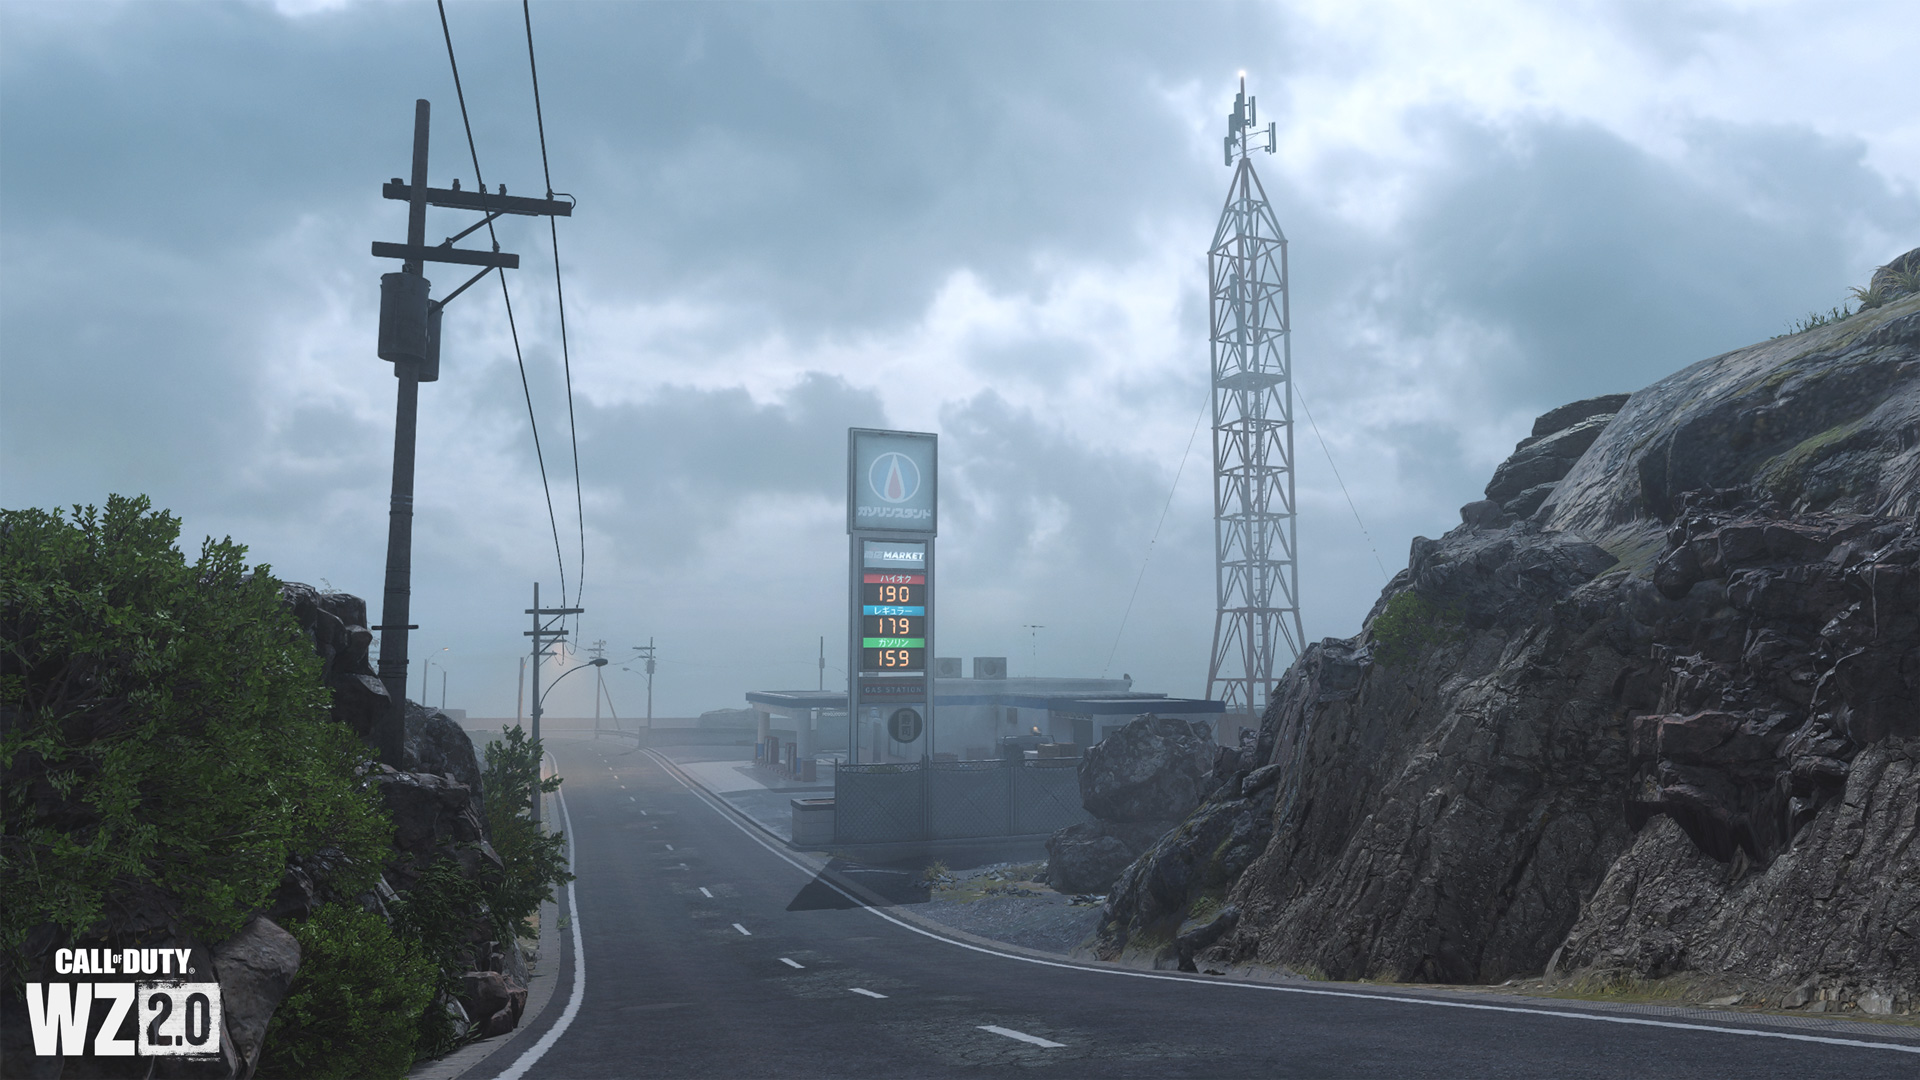
The northeastern tip of the island features a comms tower (one of three across the island) and impressive (but exposed) views across towards the castle. Below are the sea defenses and the rocky ocean shore, and a small gas station close to the Residential District and main road.
Ashika Island will become the DZ for Resurgence Battle Royale and an additional DMZ infiltration option as part of Season 02 of Call of Duty®: Modern Warfare® II and WarzoneTM 2.0, launching February 15 on all platforms. Expect more Season 02 intel in a seasonal announcement blog to be released on February 8.
Stay frosty.
Cosa ne pensate di tutte queste novità community? Vi piace la nuova mappa Ritorno di Warzone 2? La discussione, come sempre, è assolutamente aperta!
- Articolo realizzato in collaborazione con la community di riferimento di Warzone d’Italia (Facebook – Instagram)
Articoli correlati:
- #1 WhosImmortal svela le statistiche “nascoste” degli accessori di Warzone 2: “non fidatevi degli indicatori nell’Armaiolo”
- #2 Jgod si sbottona e loda Ashika Island: “ha già qualcosa in più di Rebirth”; I giocatori: “vogliamo i POI come mappe multiplayer”
- #3 Warzone 2, sveliamo la nuova (piccola) mappa RITORNO Ashika Island!