Nuova mappa Multiplayer di Modern Warfare 2: ecco l’anteprima di DRC Zone 1
Con l’enorme aggiornamento di questa sera sarà disponibile una nuova mappa anche nel multiplayer di Modern Warfare 2.
In particolare, la patch odierna introduce la nuova zona chiamata DRC Zone 1, una mappa di dimensioni medio piccole che favorisce gli scontri a fuoco ravvicinato ed in spazi angusti e ristretti.
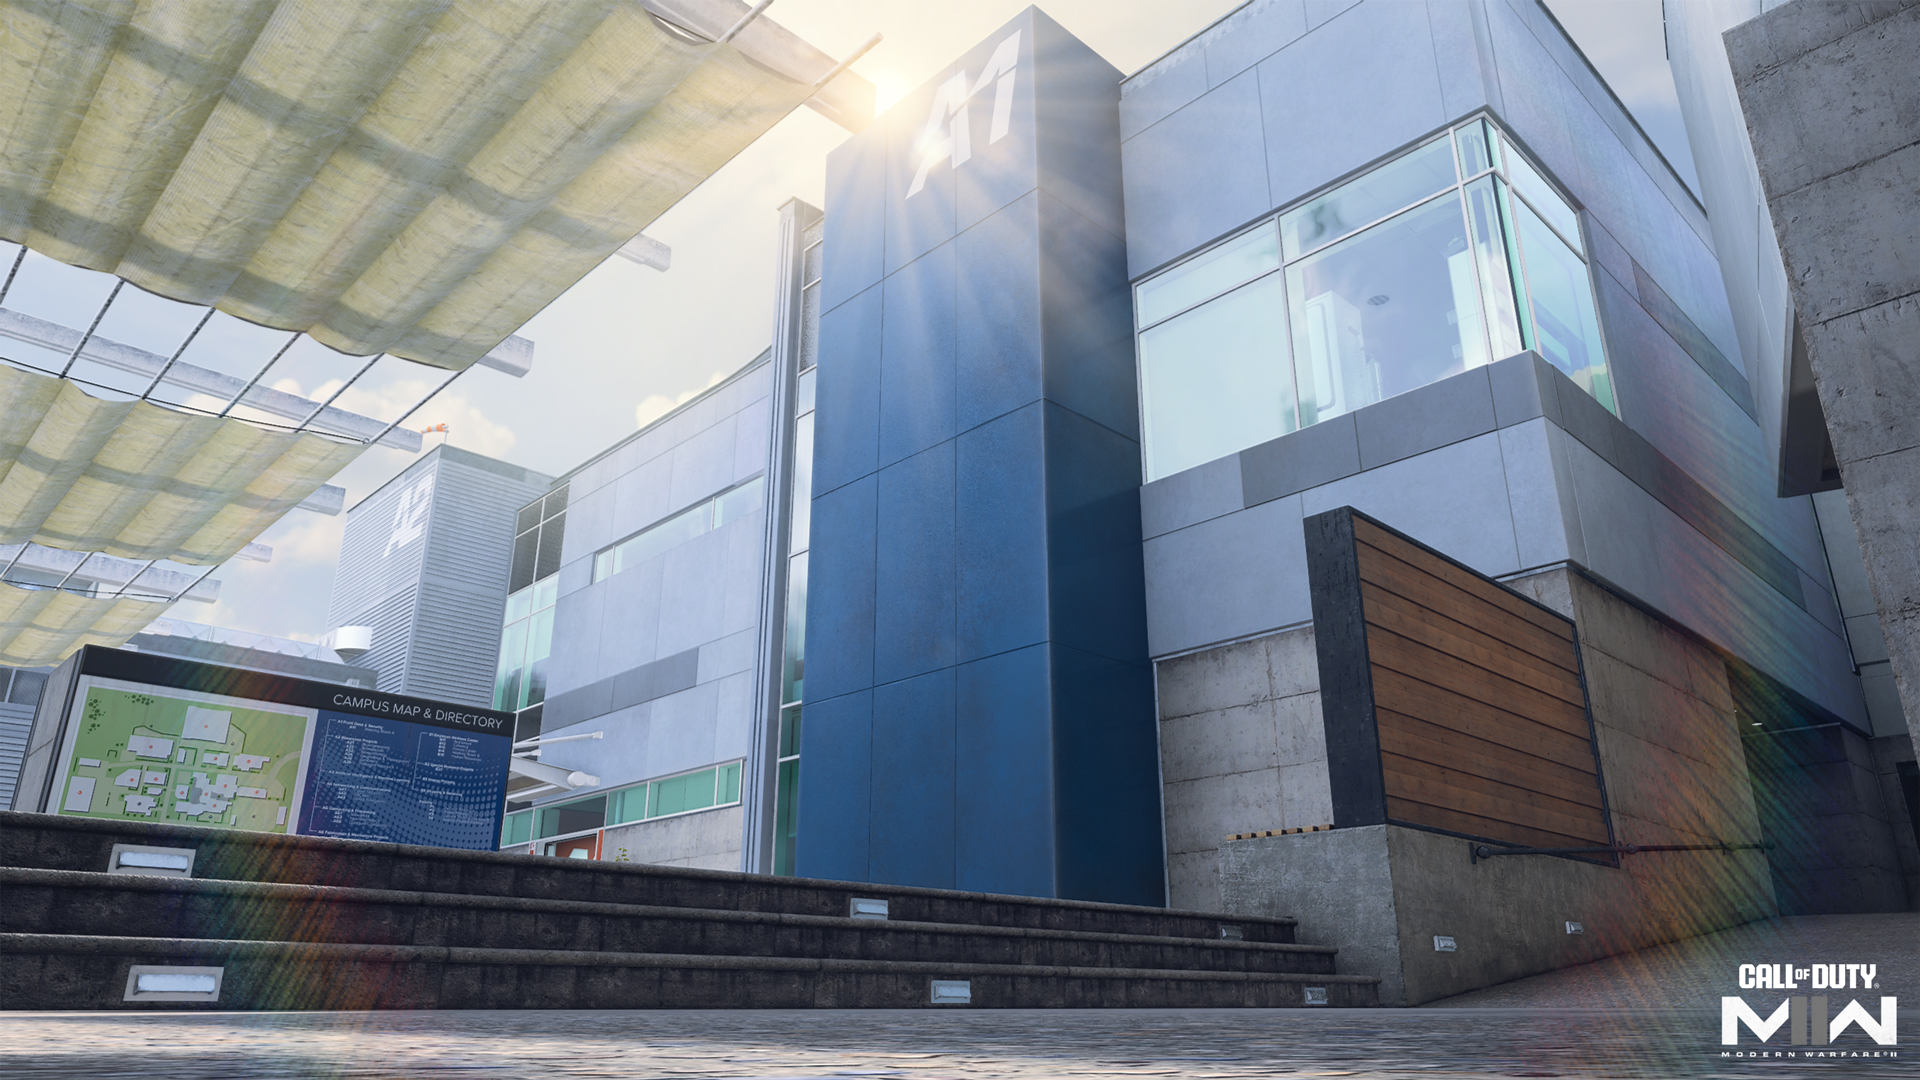
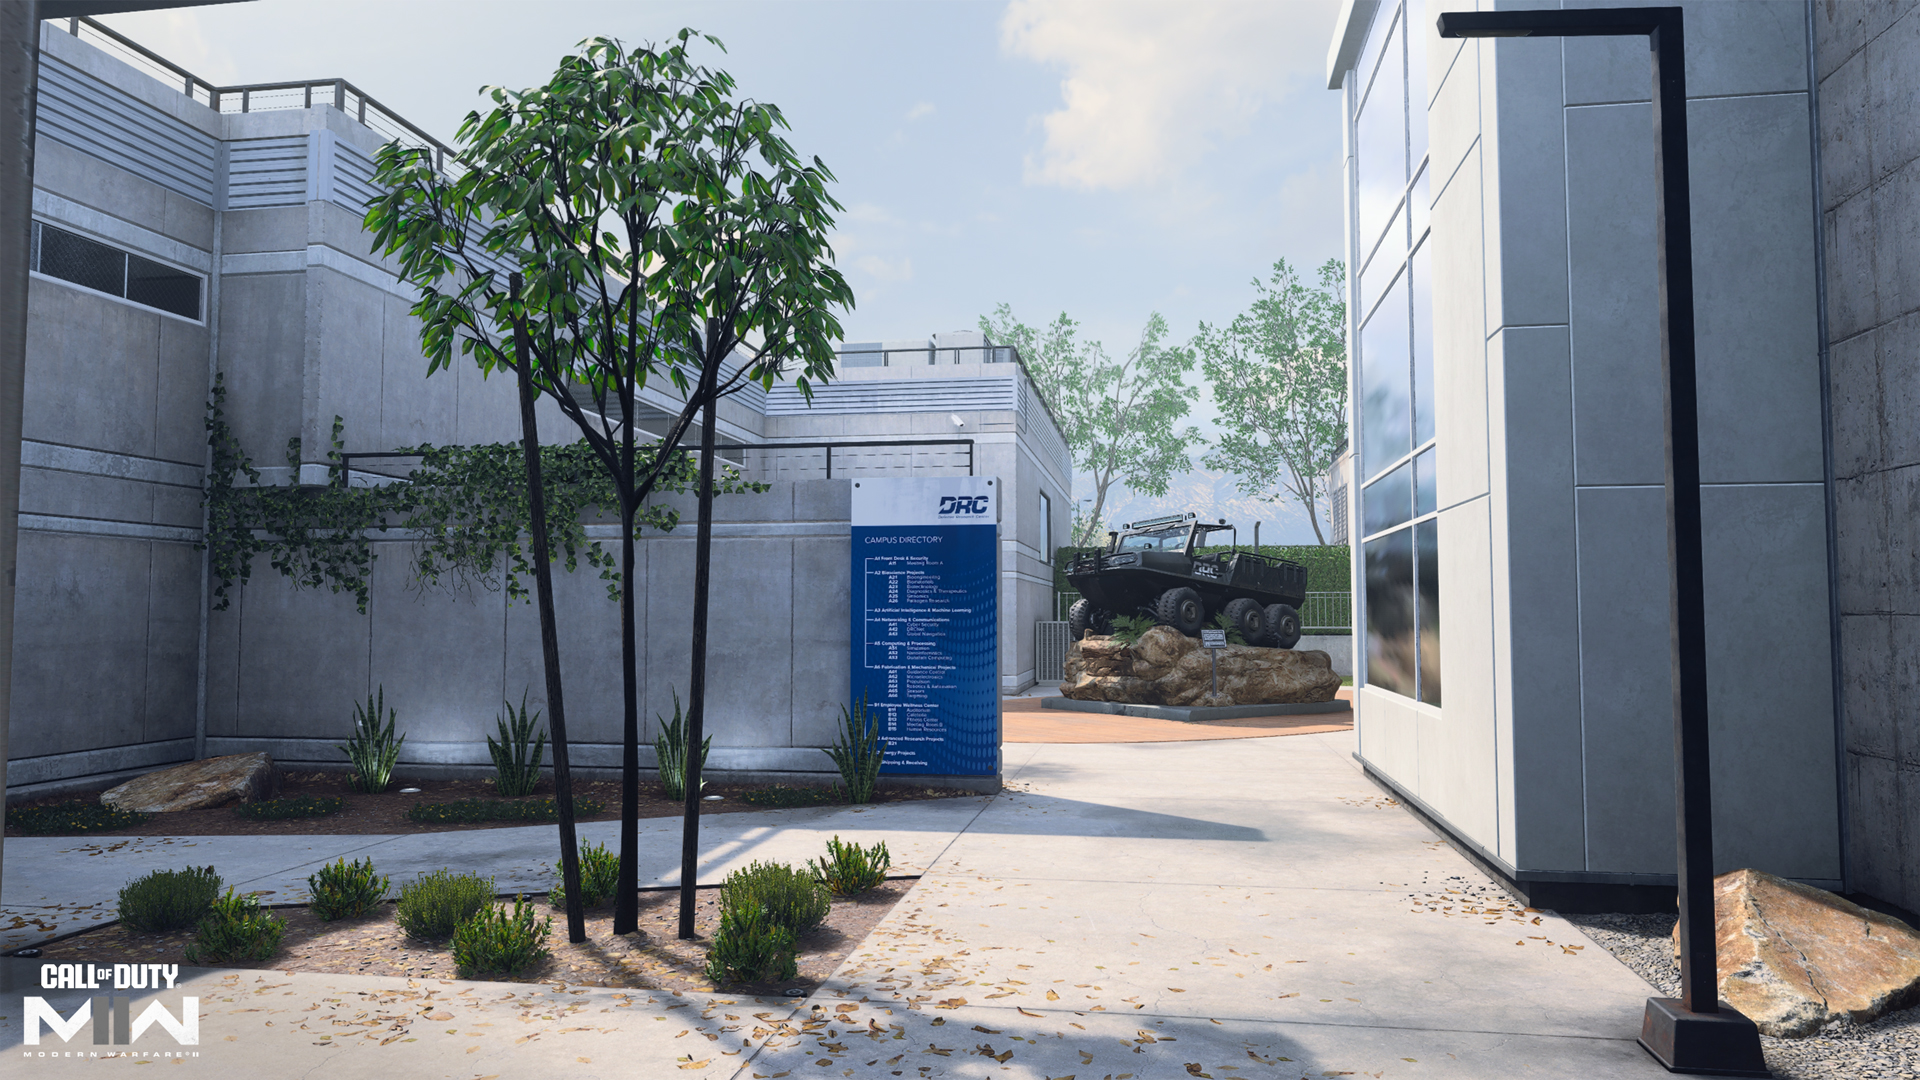
Il Defense Research Center Zone 1 (o DRC Zone 1, ndr), è un campus di ricerca con progetti legati alla bioscienza, all’intelligenza artificiale, all’elaborazione informatica e ad altri settori altamente tecnologici. La posizione esatta della mappa è riservata, consentendo agli operatori di concentrarsi unicamente sul campus.
La “zona 1” rappresenta una piccola porzione del campus, che è invece decisamente più grande. Potremo esplorare gli edifici dedicati alla ricerca e lo sviluppo, ai laboratori ed alla lobby, posizionati attorno al cortile centrale, ma anche al patio esterno. Ad eccezione del reparto di ricerca e sviluppo, gli spazi interni qui sono stretti, e favoriscono combattimenti ravvicinati e frenetici in tutta la mappa.
Non è da escludere che nuove “zone” di DRC verranno rilasciate in futuro. Per il momento comunque, ecco l’anteprima ufficiale di questa nuova ed importante mappa multiplayer di Modern Warfare 2.
Spawn Point: KorTac
KorTac Spawn Zone (South) — Loading Area
There’s little time to prepare in Zone 1’s tight environment, but a strong start can help build an early match streak. Head straight up to the Courtyard to get right into the fight or set up in R&D and eliminate incoming enemies. Take the Warehouse route for a more cautious approach; there are fewer entry points and a protected boundary running up to the Parking Lot.
Spawn Point: SpecGru
SpecGru Spawn Zone (North) — Parking Lot
The Parking Lot is double the size of the Loading Area; players with long-ranged Loadouts may choose to stay put to utilize the area’s long sightlines. For a more aggressive approach, race through the Lobby and Labs into the Courtyard. This is where close-quarters shines. Take the Service Access ramp to the Patio for a more controlled approach.
Map Maneuvers: Route Planning
For the purposes of this guide, we’re dividing DRC Zone 1 into five main sections:
- Parking Lot
- Lobby and Labs
- Courtyard and Patio
- Research and Development
- Loading Area
Parking Lot

The Parking Lot is the biggest exterior space on the map, an advantage that players with long-ranged Loadouts should utilize. Use the open space to create distance from your enemies. Bring a teammate to help cover the three entrances into the area. A well-positioned duo can make a lasting defense. Keep your eyes on the sky and be ready to book it inside should an overhead threat appear.
Lobby and Labs
Connecting the Parking Lot and Courtyard, the Lobby and Labs area is primed for short-ranged combat. Even the largest path through the central Lobby is fraught with danger; the center stand blocks views and presses Operators to the sides of the room. The remaining Lobby and Labs passages are mere hallways, so be ready. Use the branching paths here to get around enemies and outmaneuver them. Extend out to the Service Access ramp to regroup in the Patio.
Courtyard and Patio
At the center of the map, the Courtyard and Patio are where Operators will meet the most. With routes into the Courtyard from Lobby, Labs, R&D, and the Patio, it’s vital to move through the area carefully and be ready to engage at a moment’s notice.
On the Patio, use the campus directory for cover. While there are still multiple entry points leading here, the Patio is generally less chaotic than the Courtyard. Use its safer passage to get across the map and set up flank attacks.
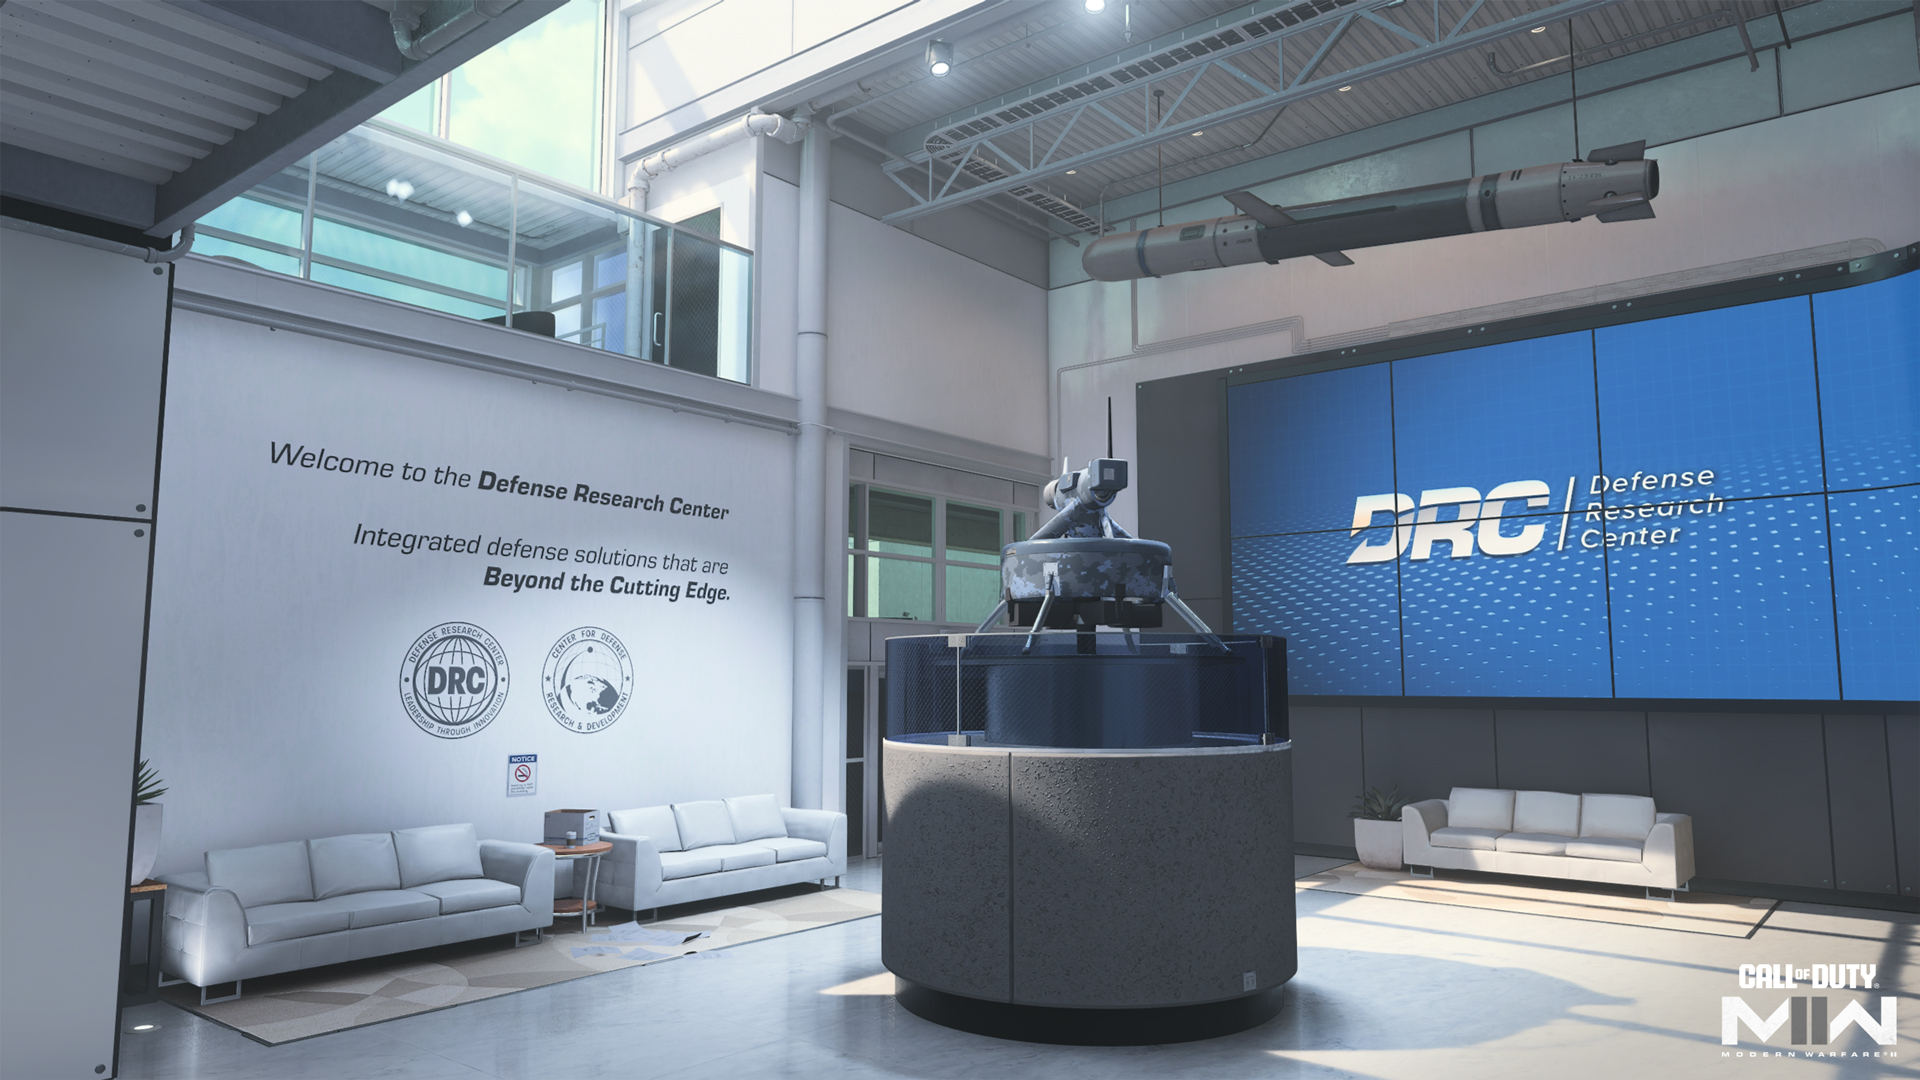
Research and Development
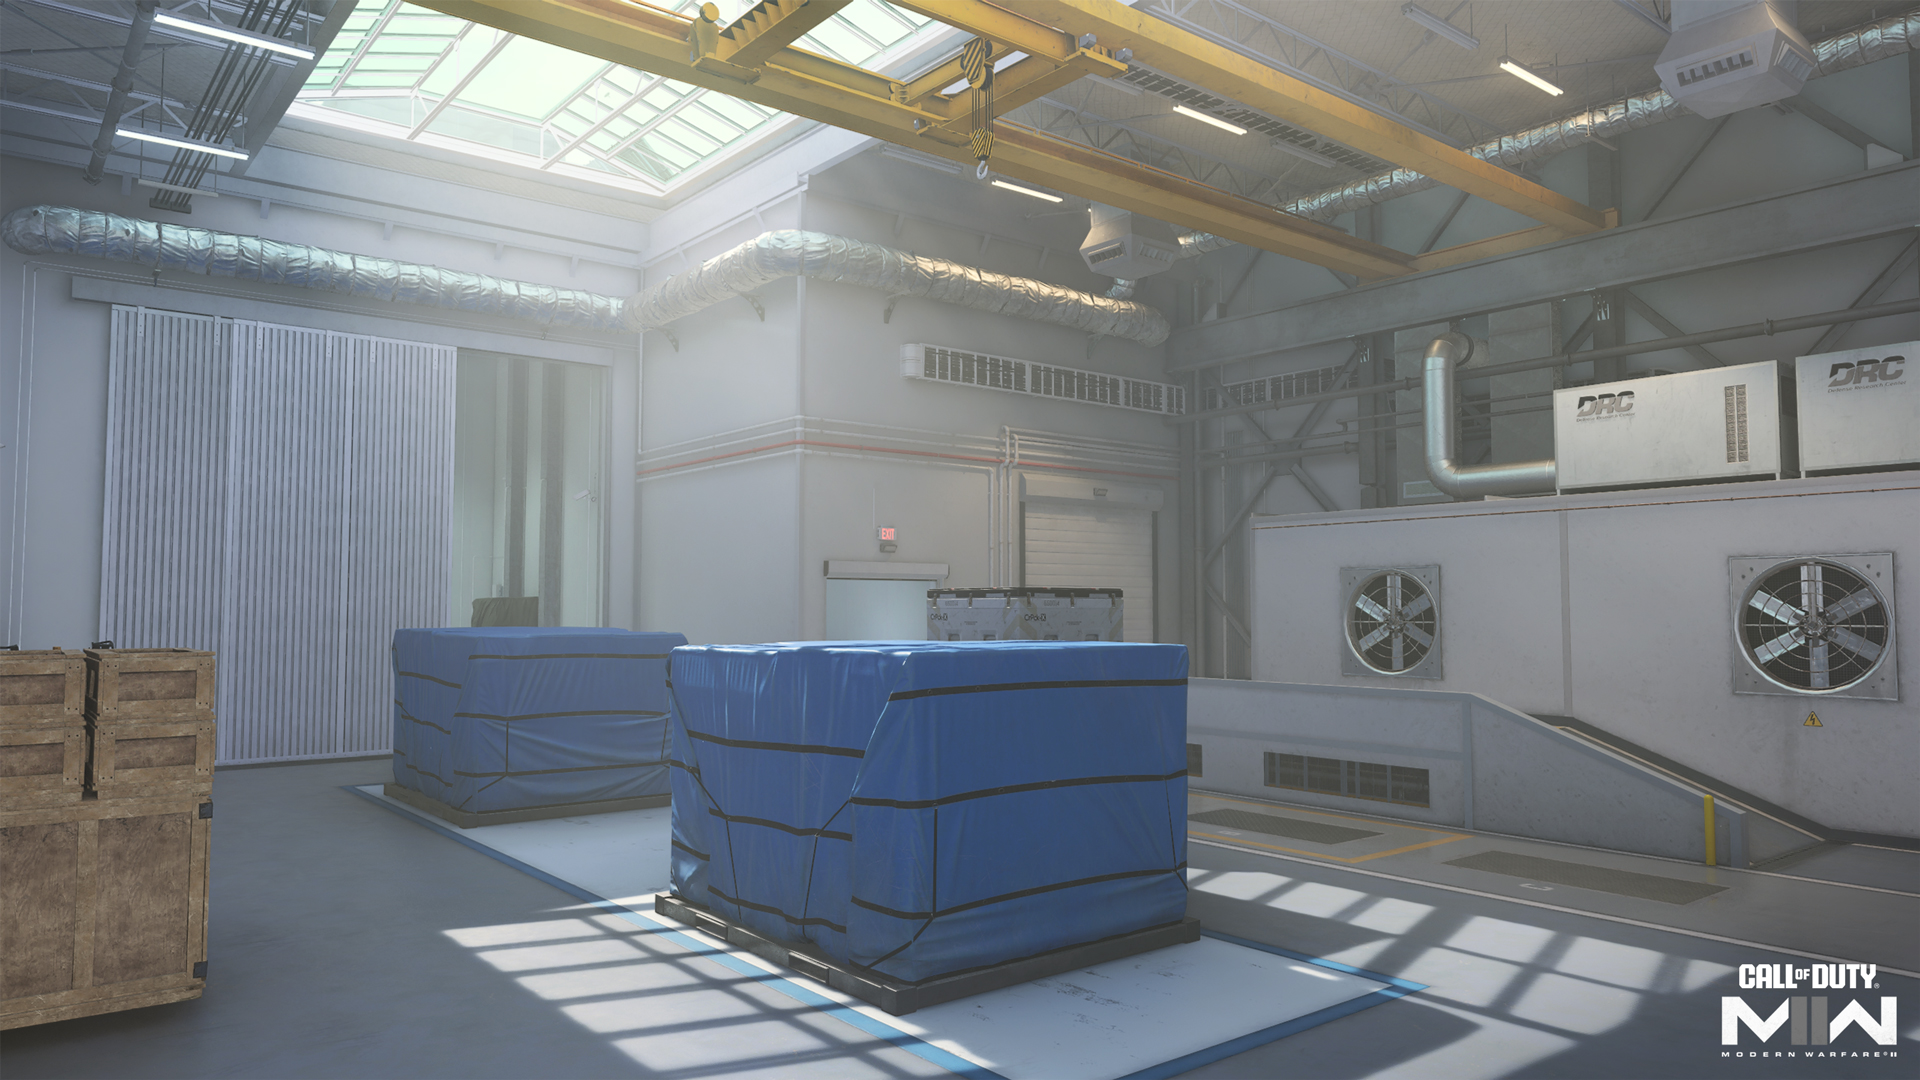
R&D is the biggest interior space on the map and boasts some interesting features. Enter the Vents in the northeast corner for an elevated view in and out of the building. Crash through the north window by climbing onto the nearby air-conditioning unit.
The interior features a narrow hallway over a larger storage room. Of the map’s inside spaces, this is the one where midranged Loadouts perform best. Note the glass ceiling over the largest room here, providing a window for streaks to hit targets inside the building.
Loading Area
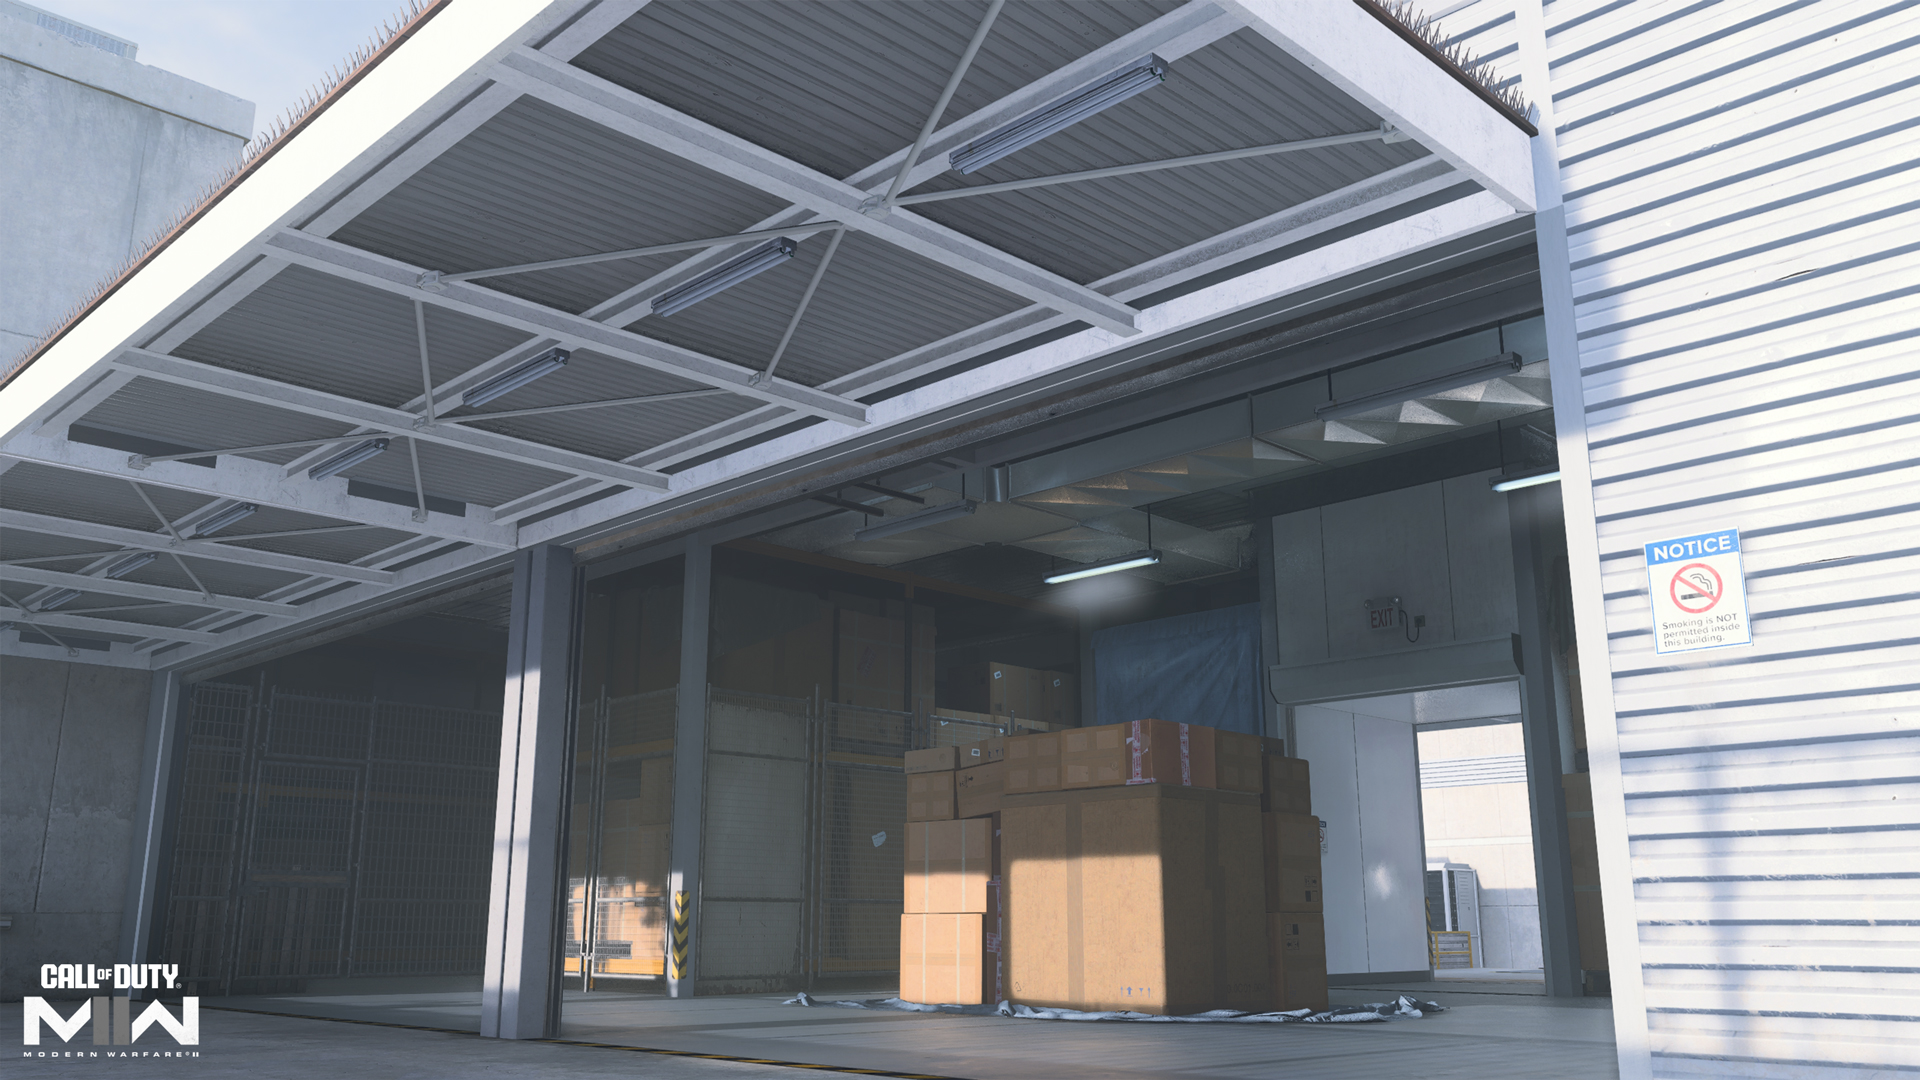
The Loading Area and Warehouse both feature large cover objects; get behind them to ambush enemies or climb on top to get over them. The Warehouse provides overhead cover in a discreet location while the Loading Area intersects with multiple locations. Weave between the two, depending on the threat at hand.
- Articolo realizzato in collaborazione con la community di riferimento di Warzone d’Italia (Clicca qui per Facebook)
Articoli correlati: